How to use OneList Configurator
- Richard Frykberg
- Duncan McIntyre
- Alex Xie
Navigate to the /onelist/admin URL then select the Adapters tab. Locate the adapter then click the Configuration button.
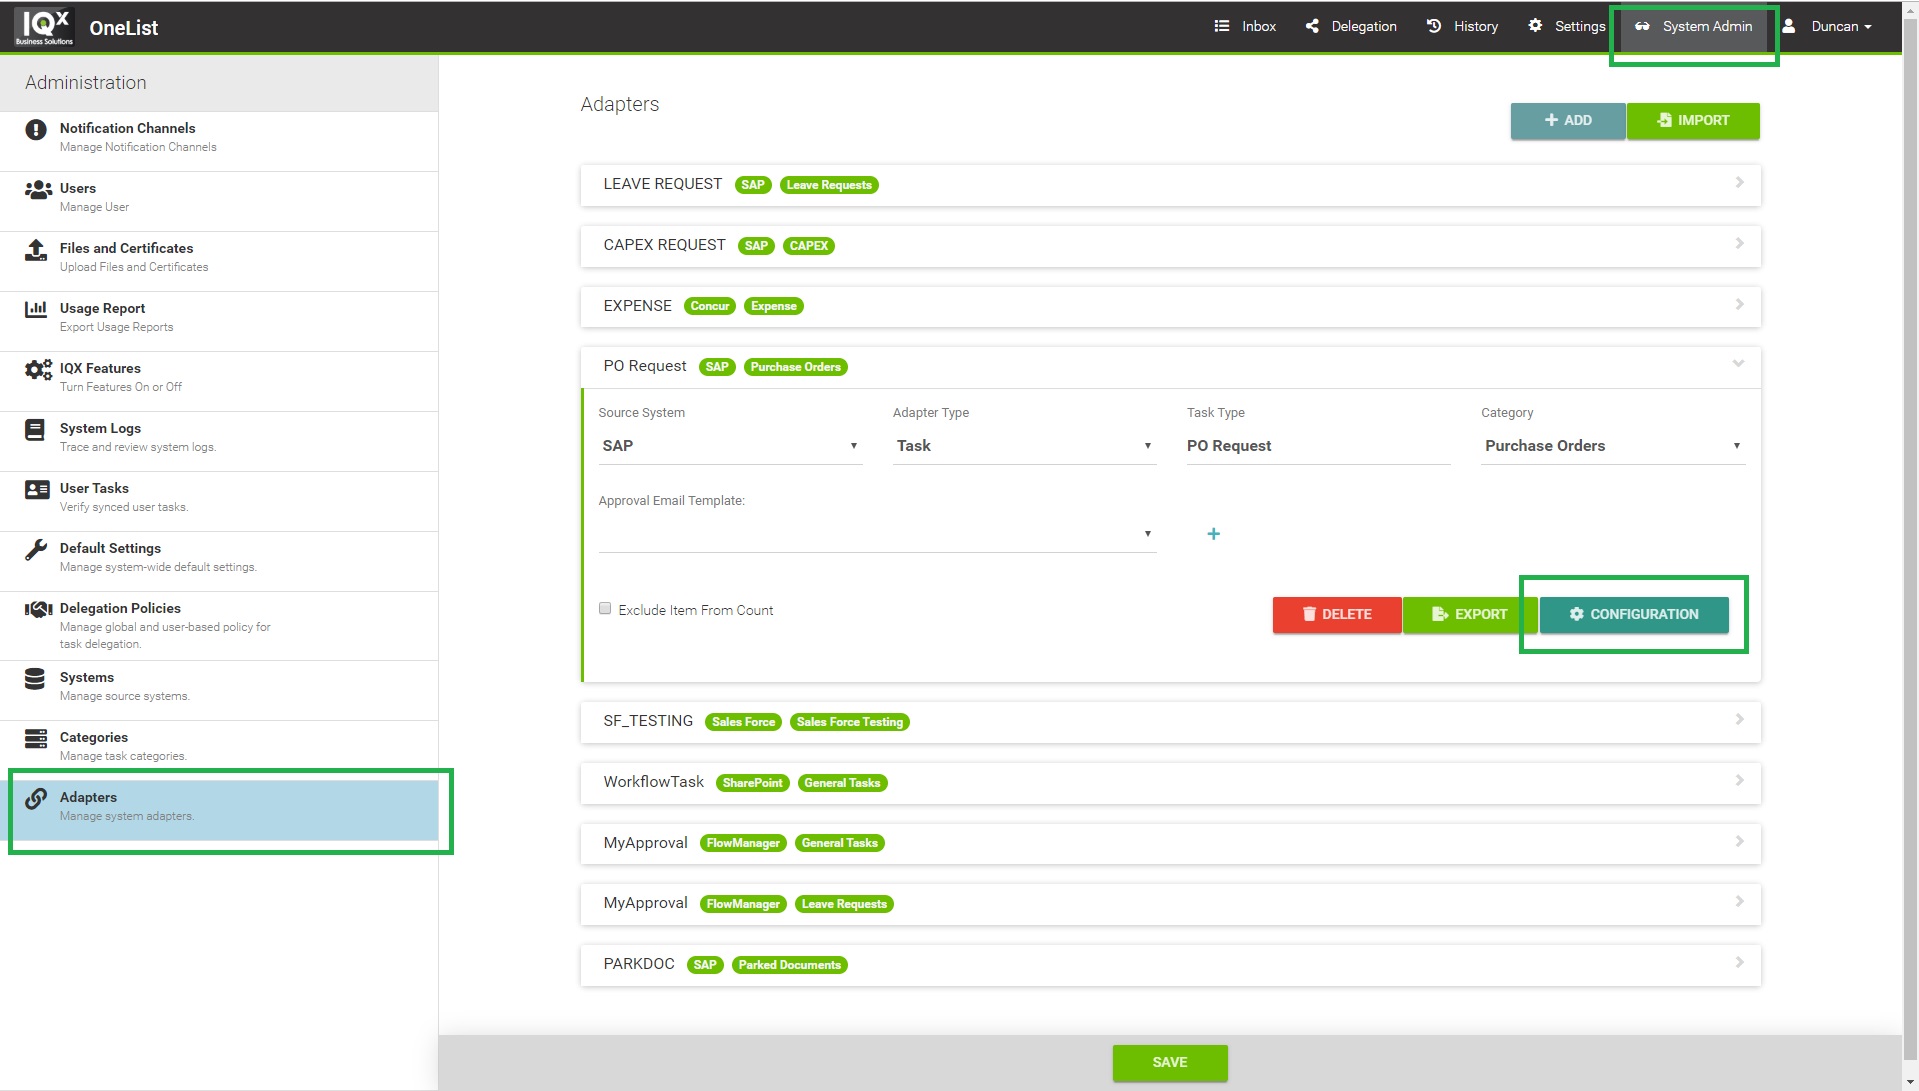
Select the transformer
Step 1 is to select the correct task tranformer.
- Select the FAB transformer for FAB form adapters. FAB approval tasks are configured directly within the FAB application.
- Select the Custom tranformer for non-FAB form adapters. Task layout is configured using the OneList configurator.
Layout the task content
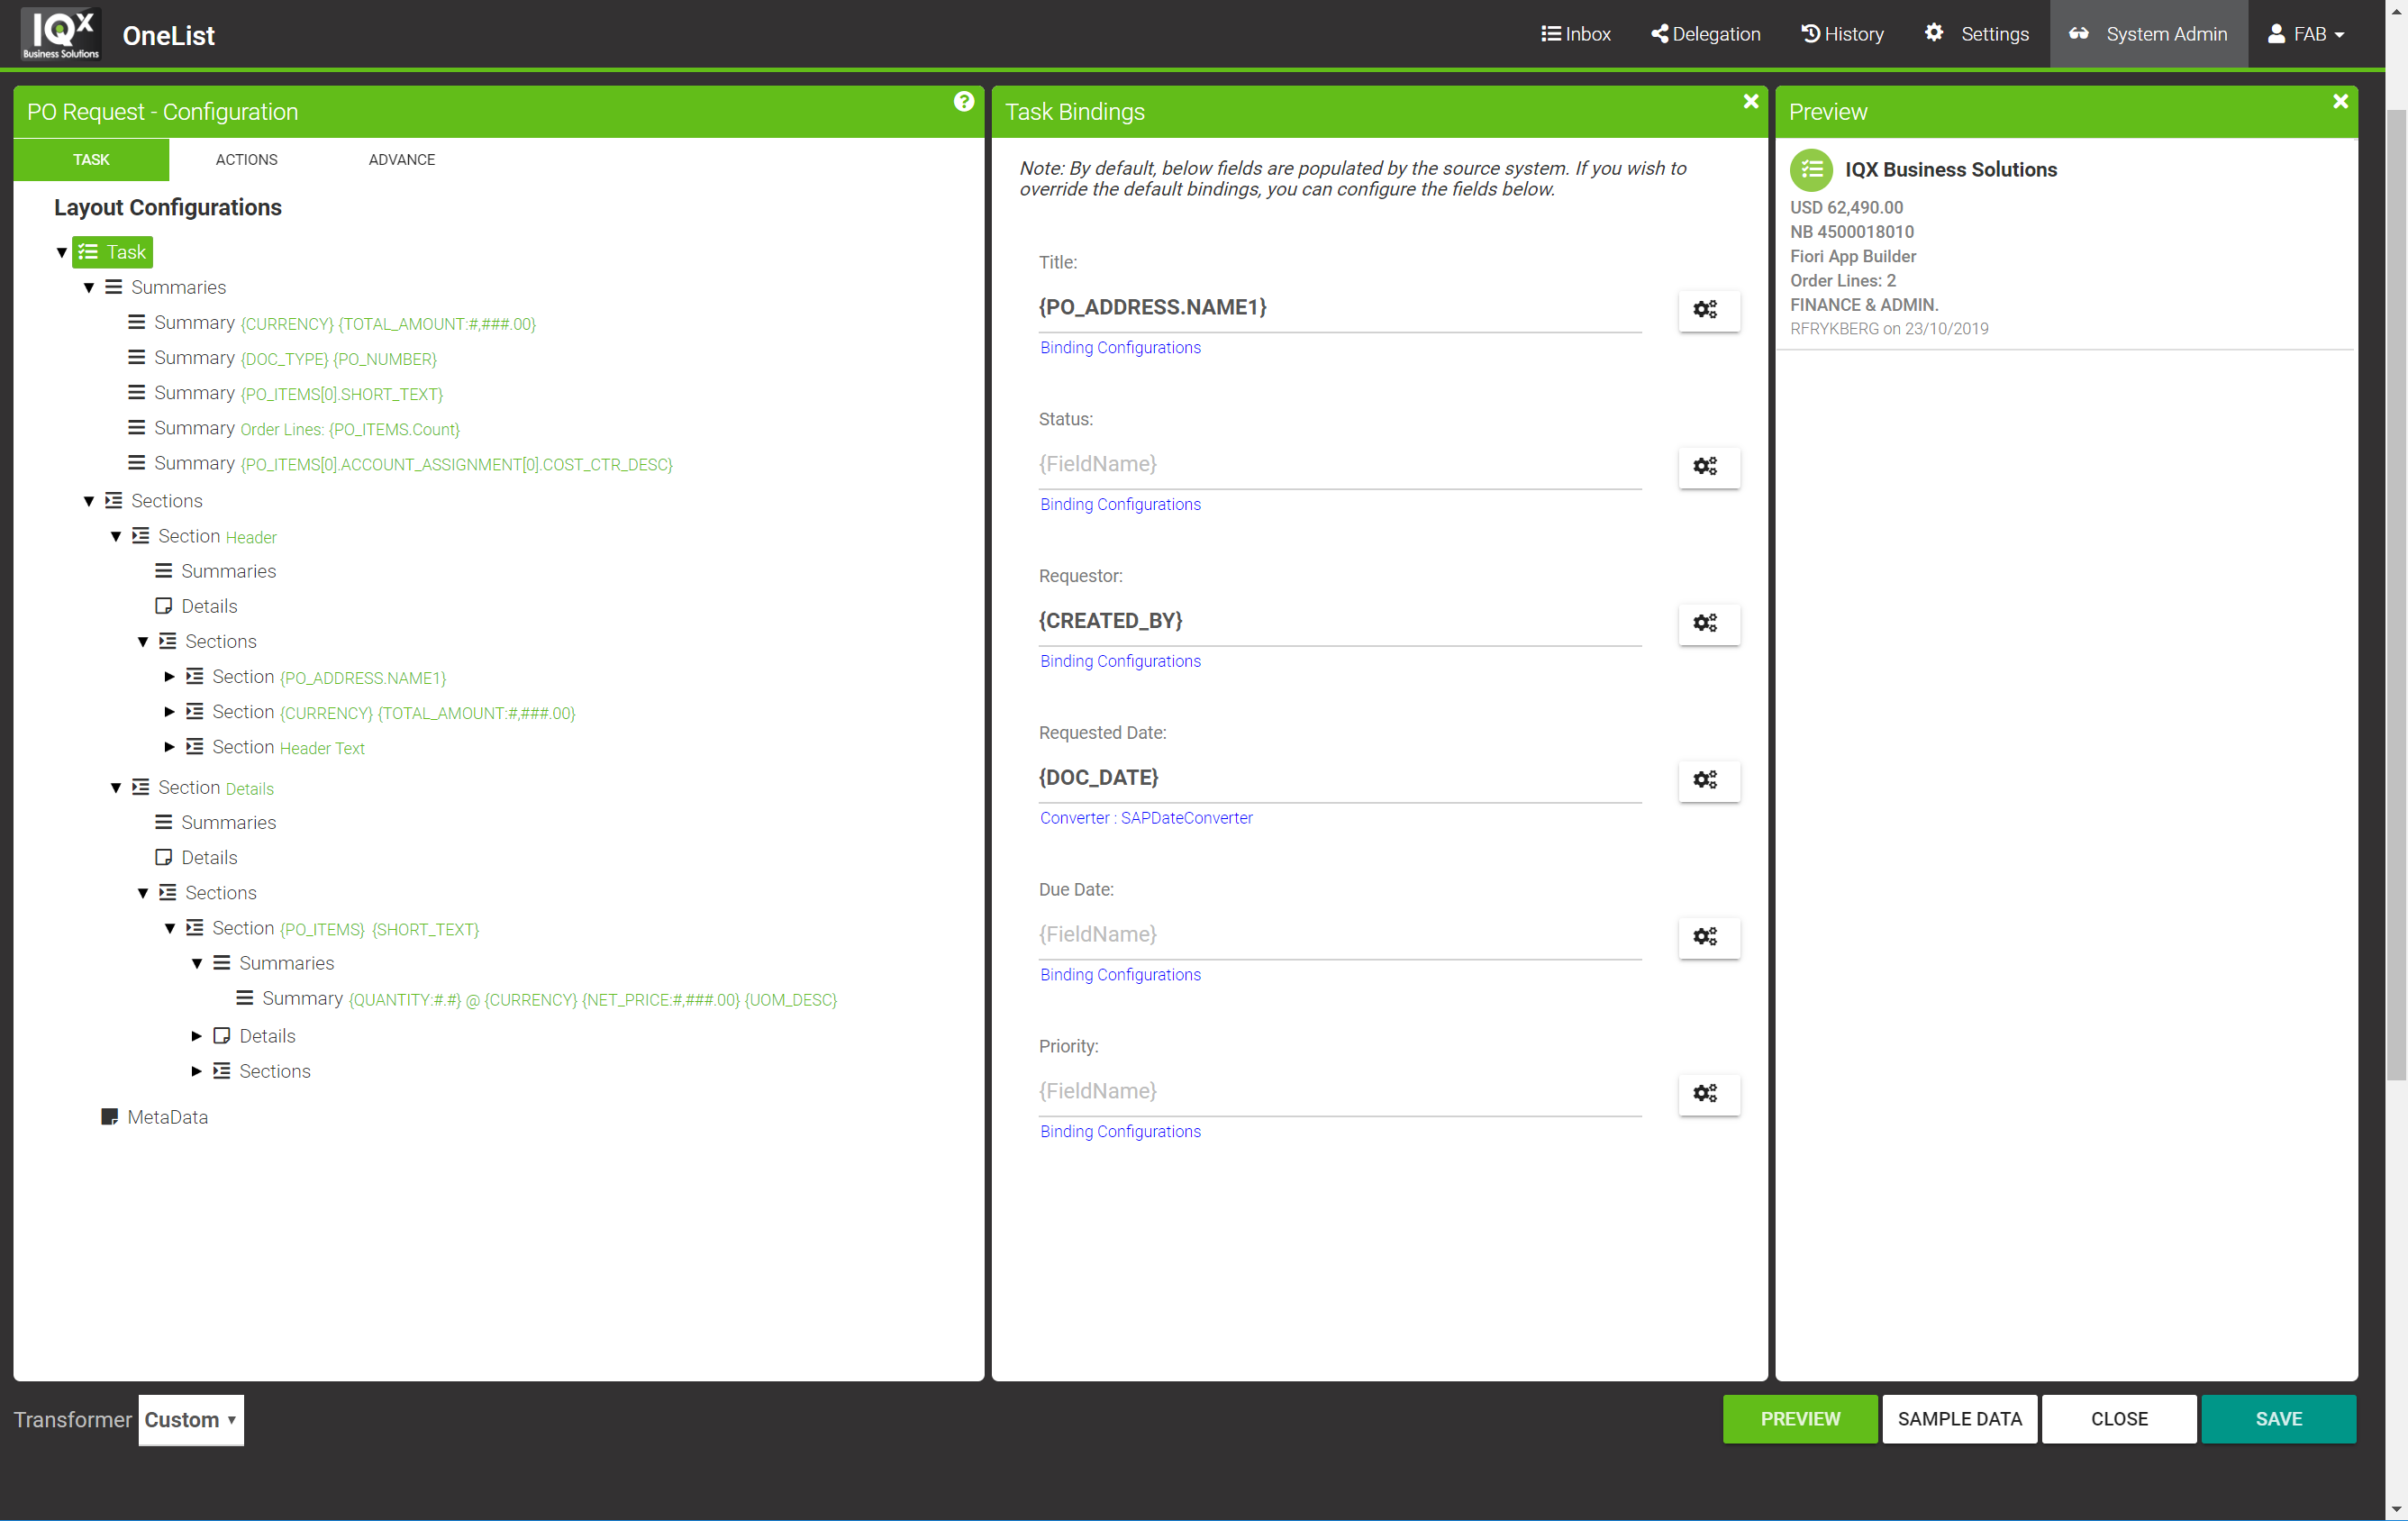
The configurator consists of 3 panes:
- 1st pane is the layout configuration where you can add, edit, delete, and move a Summary, Section, or Detail.
- 2nd pane is the bindable properties/fields per node.
- Summary node will have Value as a bindable field
- Section node will have Context, Title, and Value as bindable fields.
- Detail node will have Title and Value as bindable fields.
- Task node (the root node) will have all the optional bindable fields like Requested Date, Requestor, and so on.
- 3rd pane toggles between the Binding Picker and Preview
Click on the top-level task node. This shows the standard task attributes applicable to all tasks that are passed to OneList. The source system adapters populate these attributes if possible. In the configurator, it is possible to over-ride the adapter mapping and different object properties to the key attributes of Title, Status, Requestor, Requested Data, Due Data and Priority. Note these fields are available for filtering and sorting in the OneList clients even if not displayed in the User Interface.
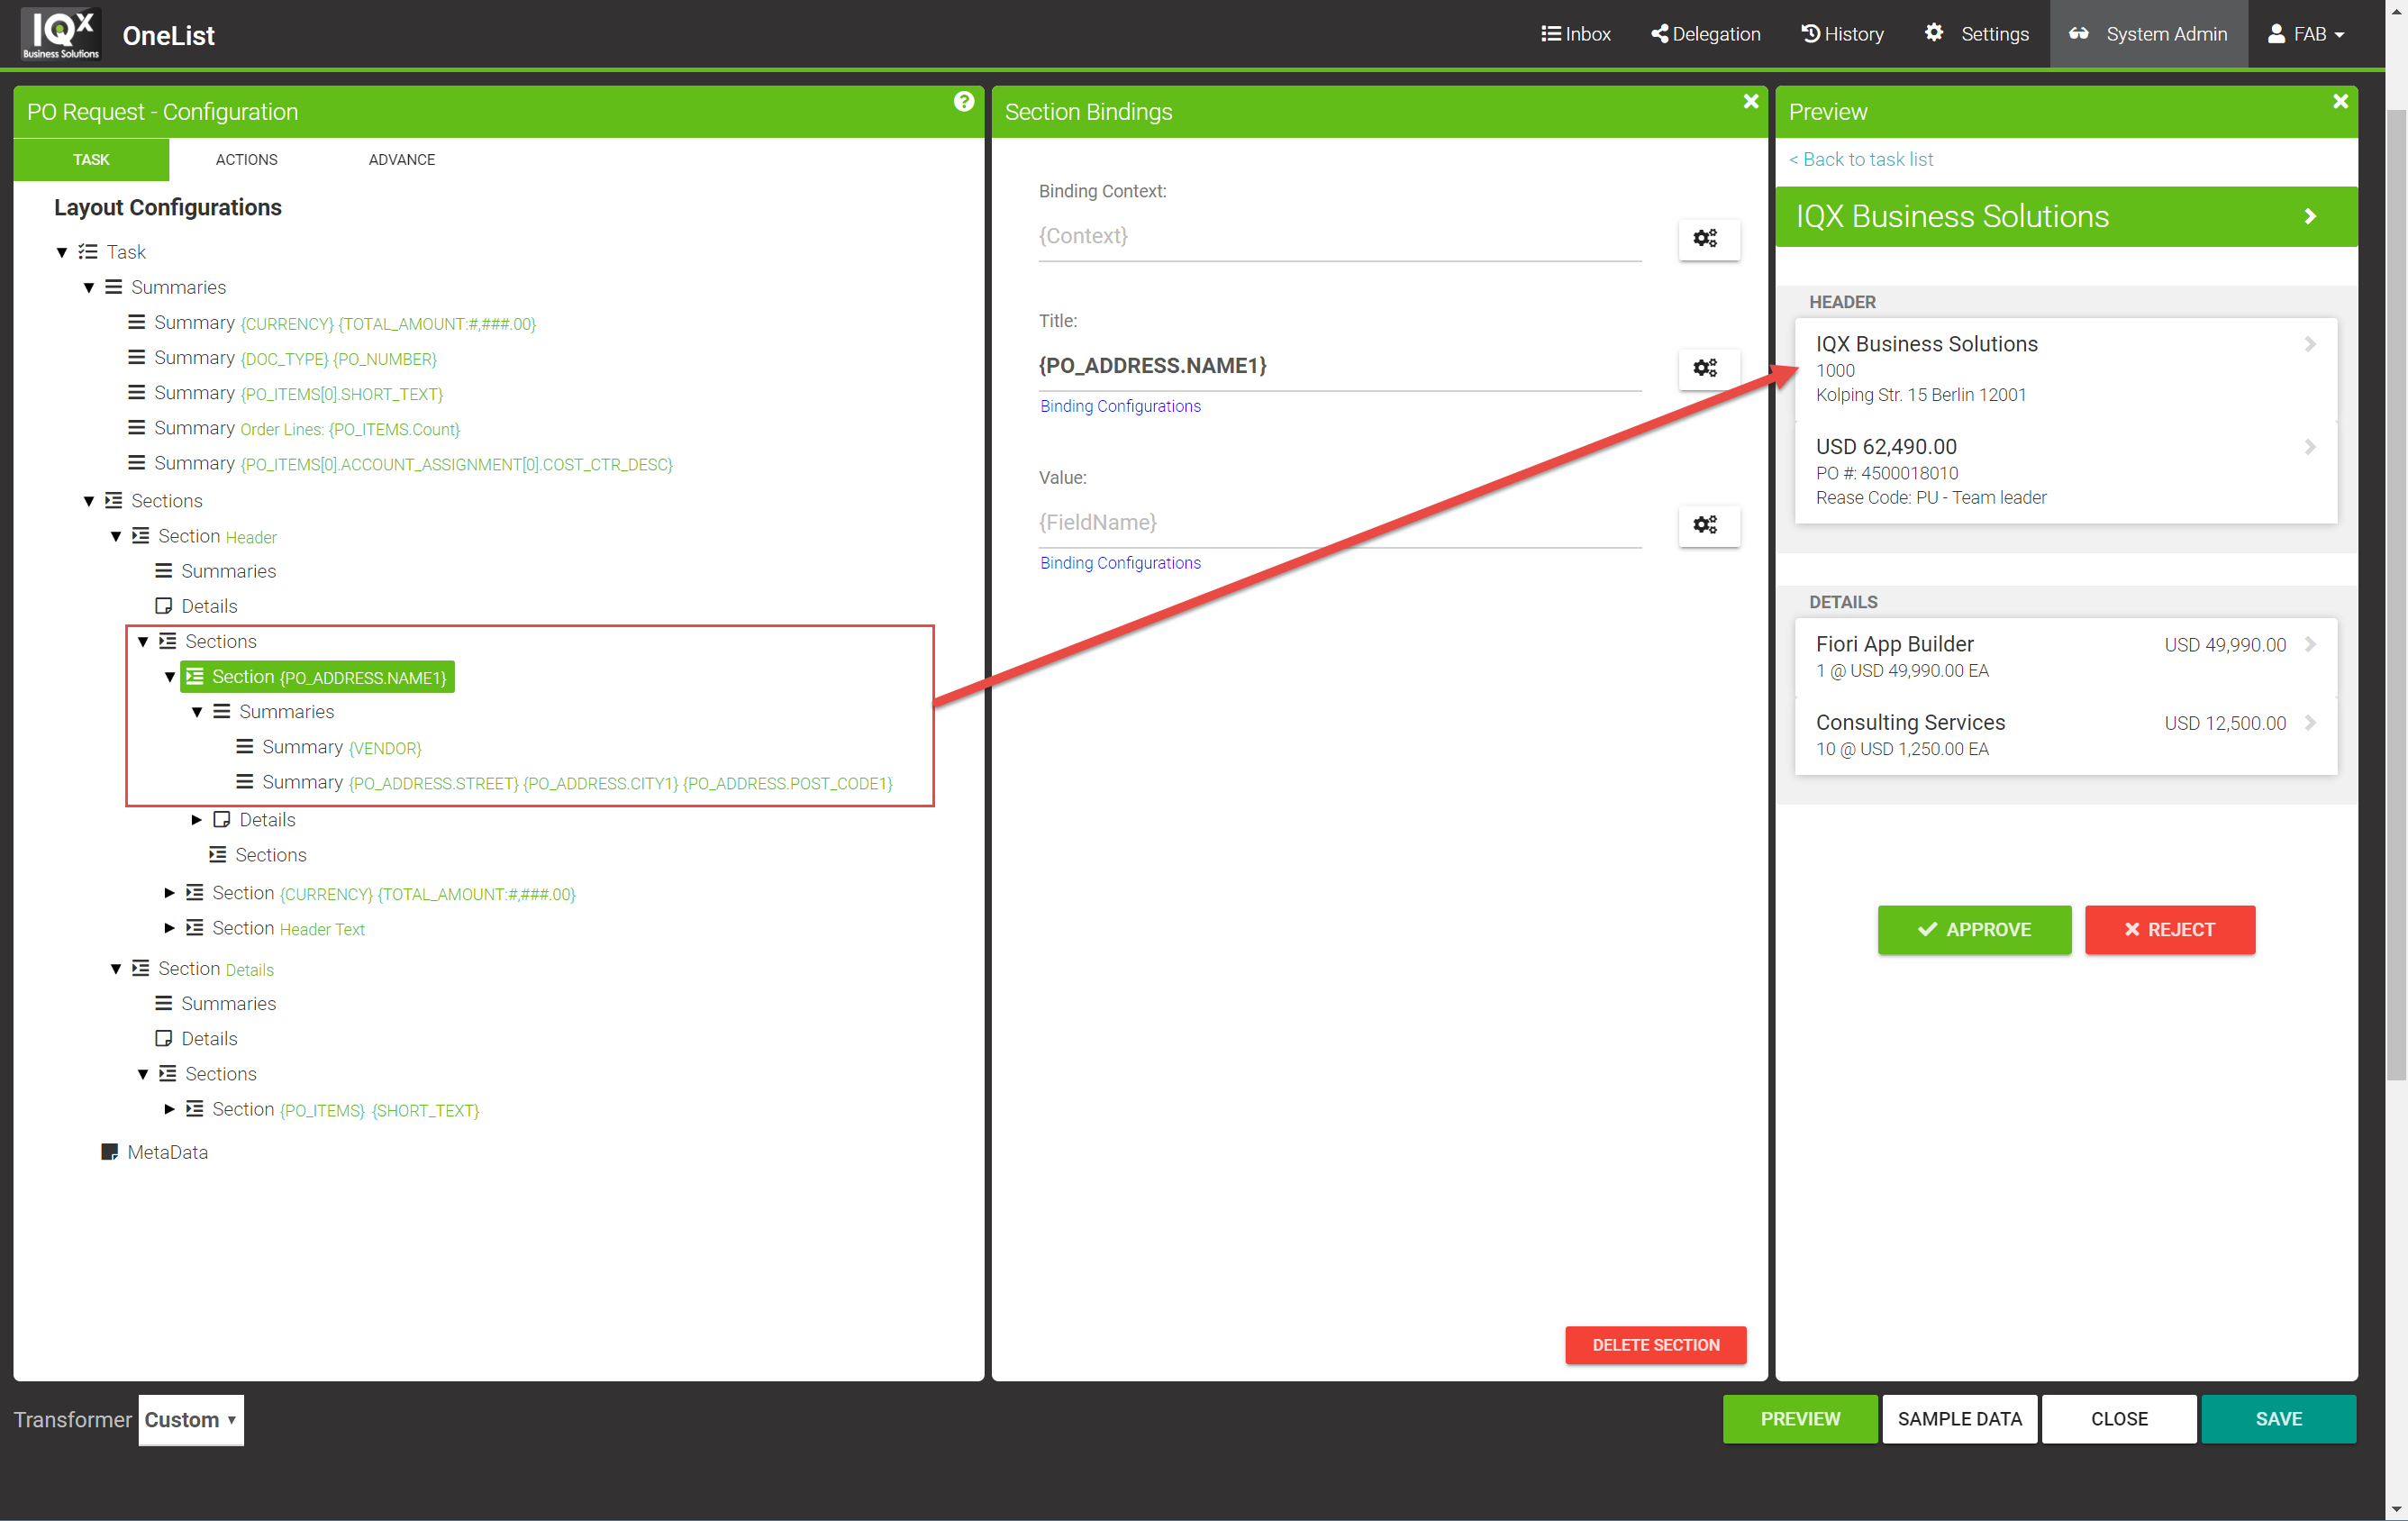
The layout of Tasks consists of Sections, Summary lines within a section, and drill-down Details. A section has a title as illustrated below (The section title below is bound to the Name1 field of the Purchase Order address):
When a section contains details, the end-user will be able to drill down on the section to view the details as a list of fields. Details have a title and value.
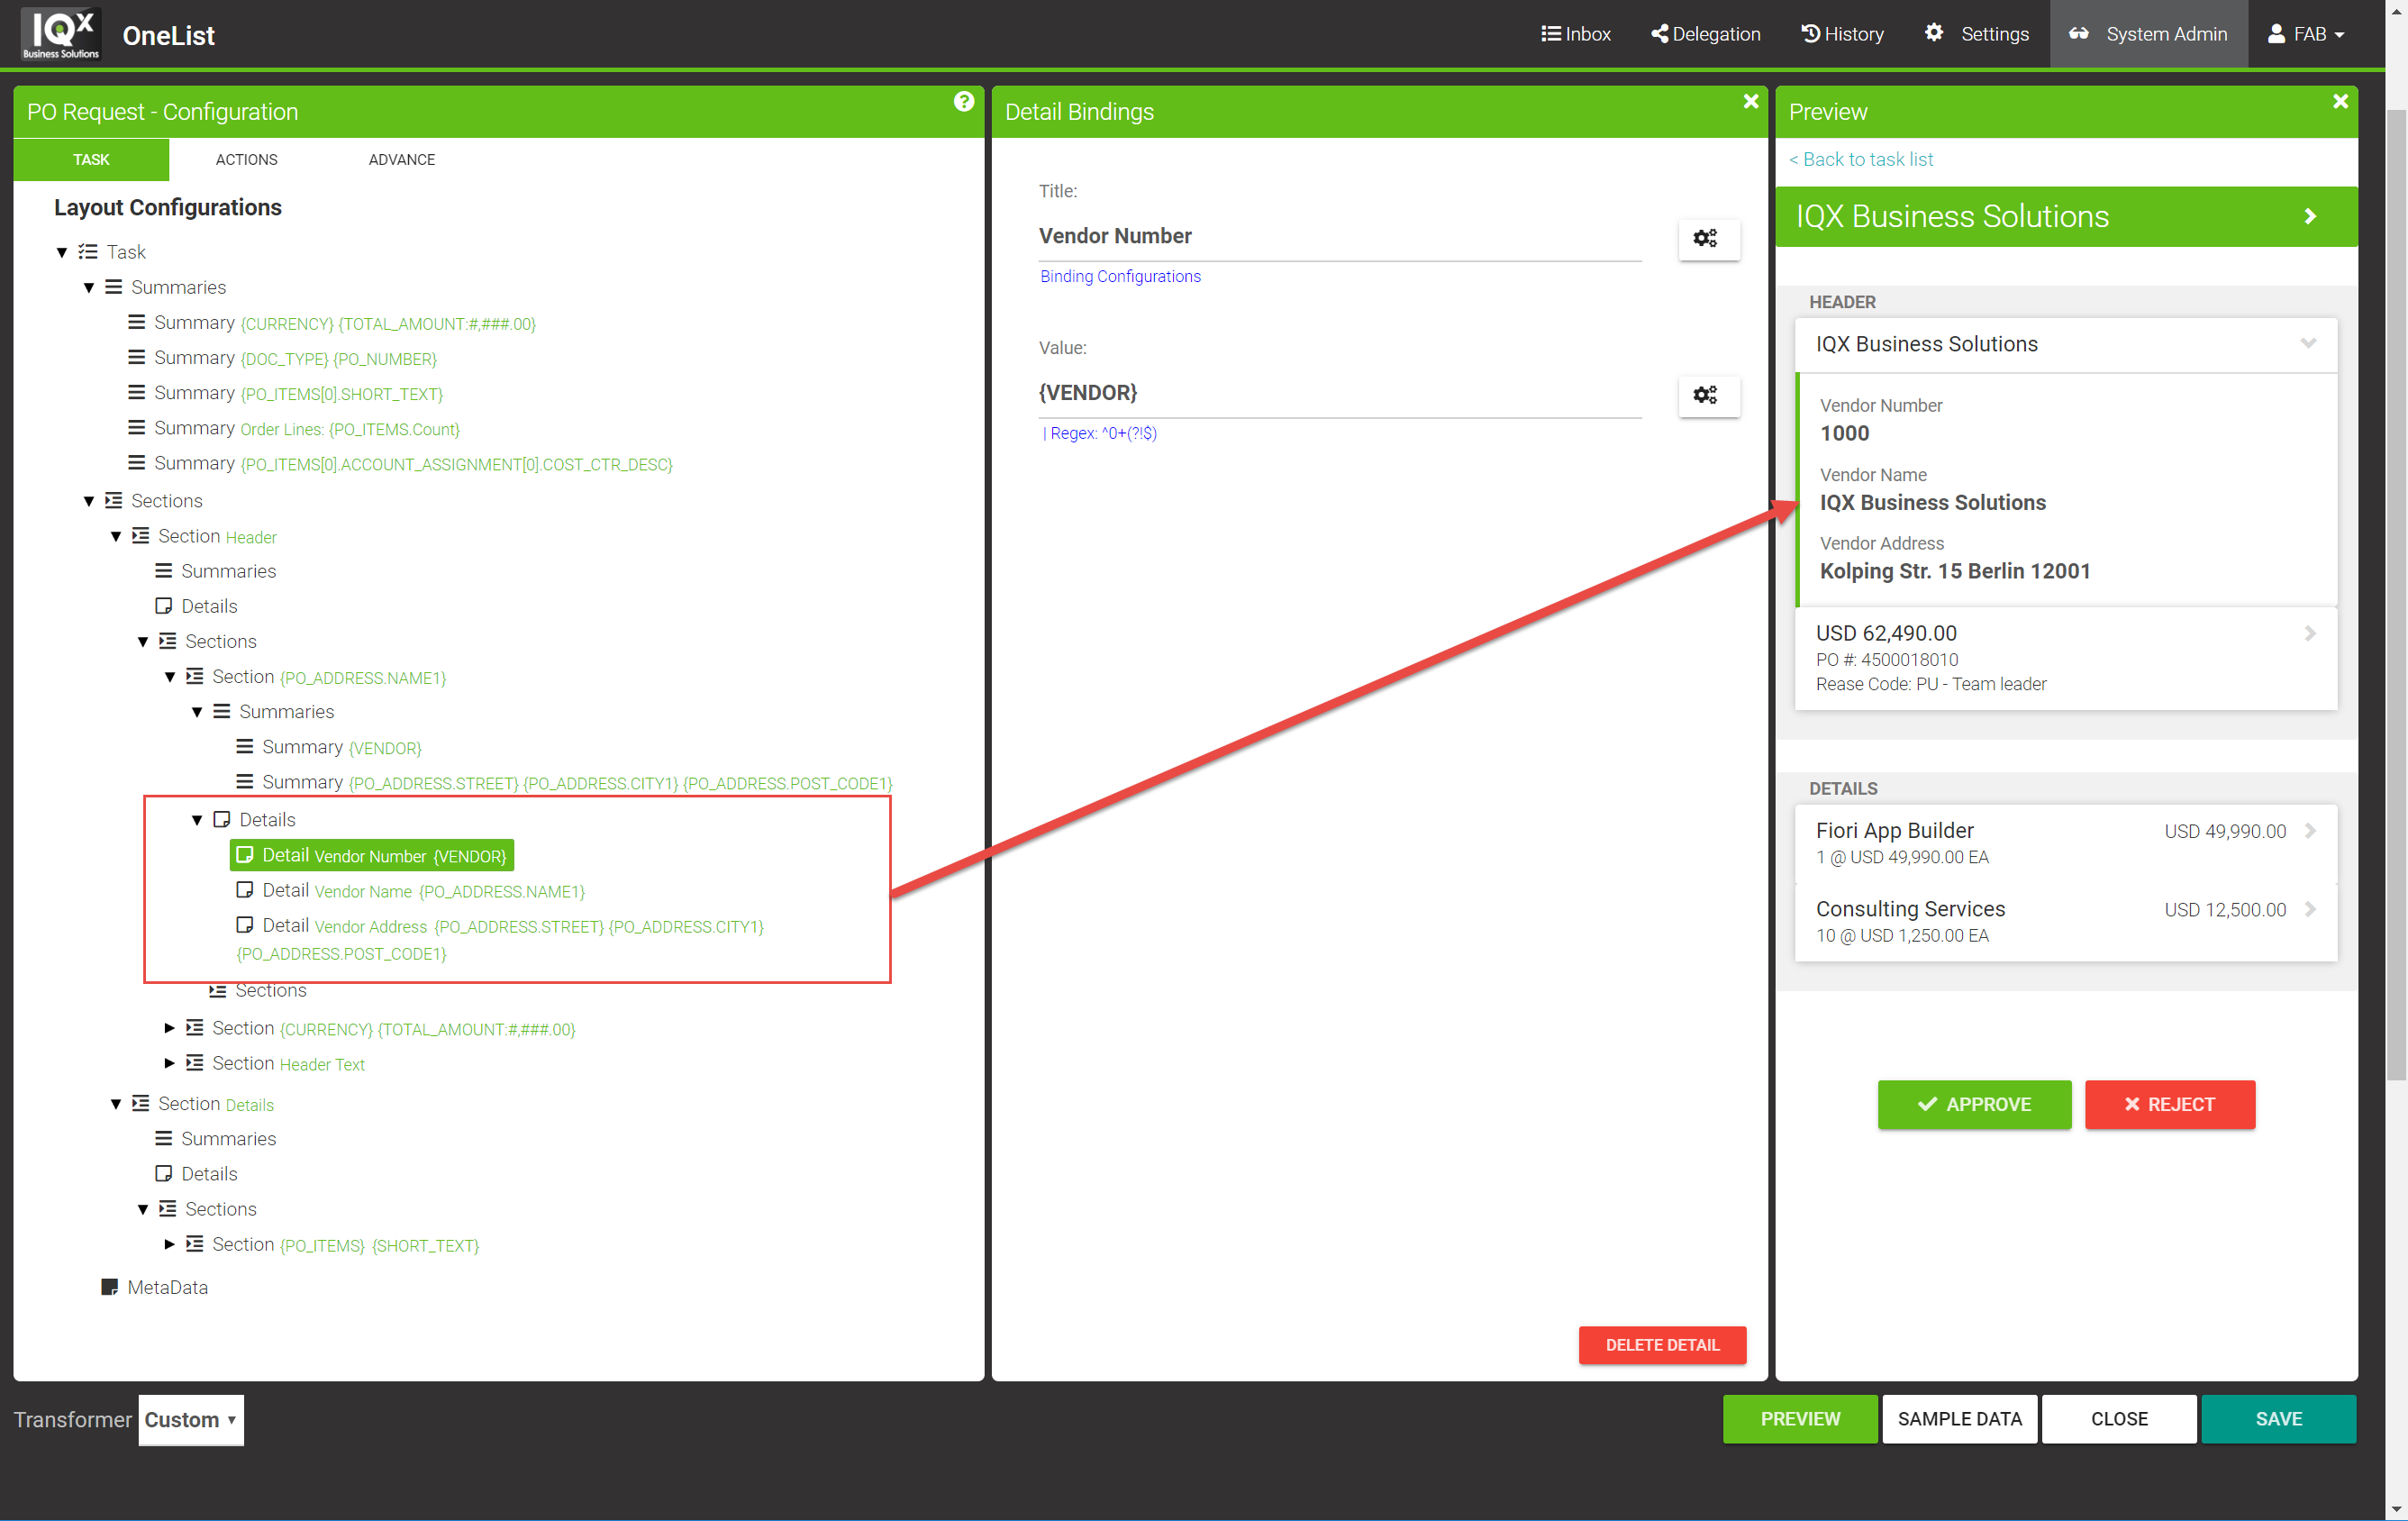
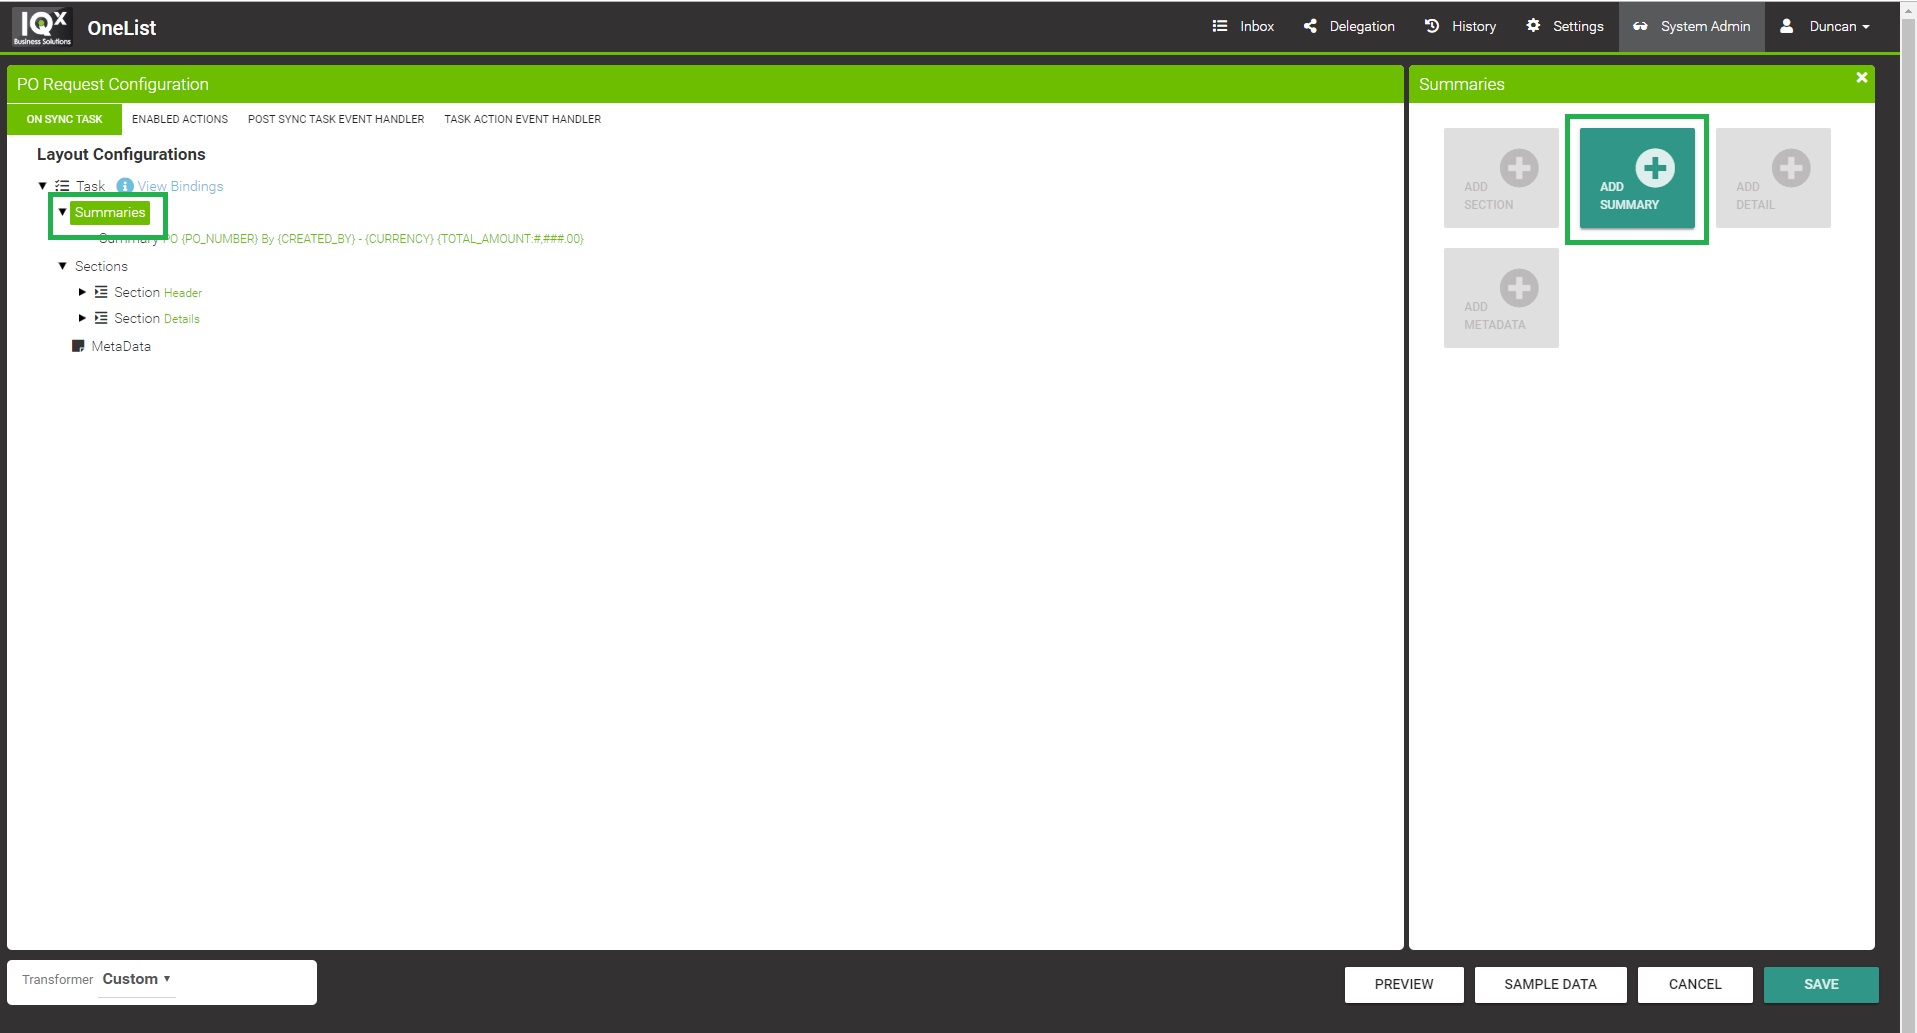
To add a Summary, Section, or Detail, click on the Summaries, Sections, or Details node in the left treeview respectively.
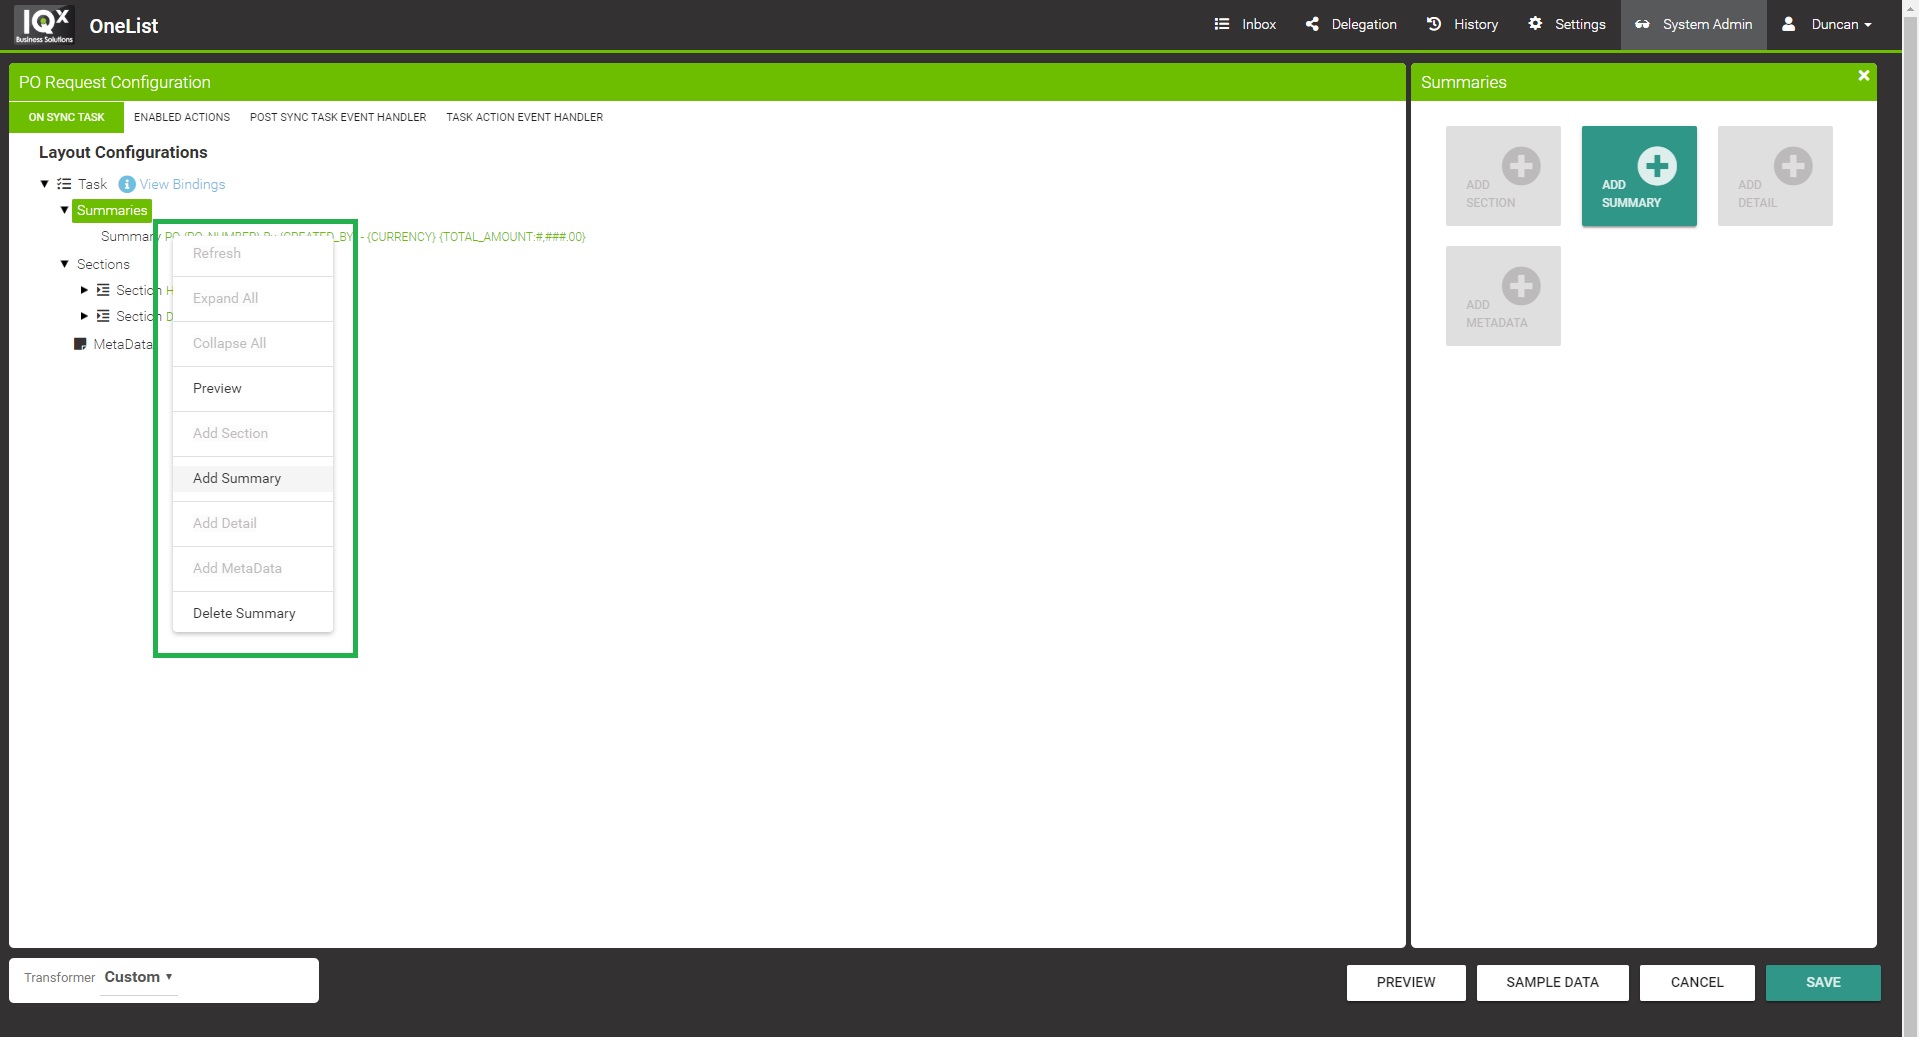
Or right-click on a node to bring up a context menu with the available actions like adding or deleting items.
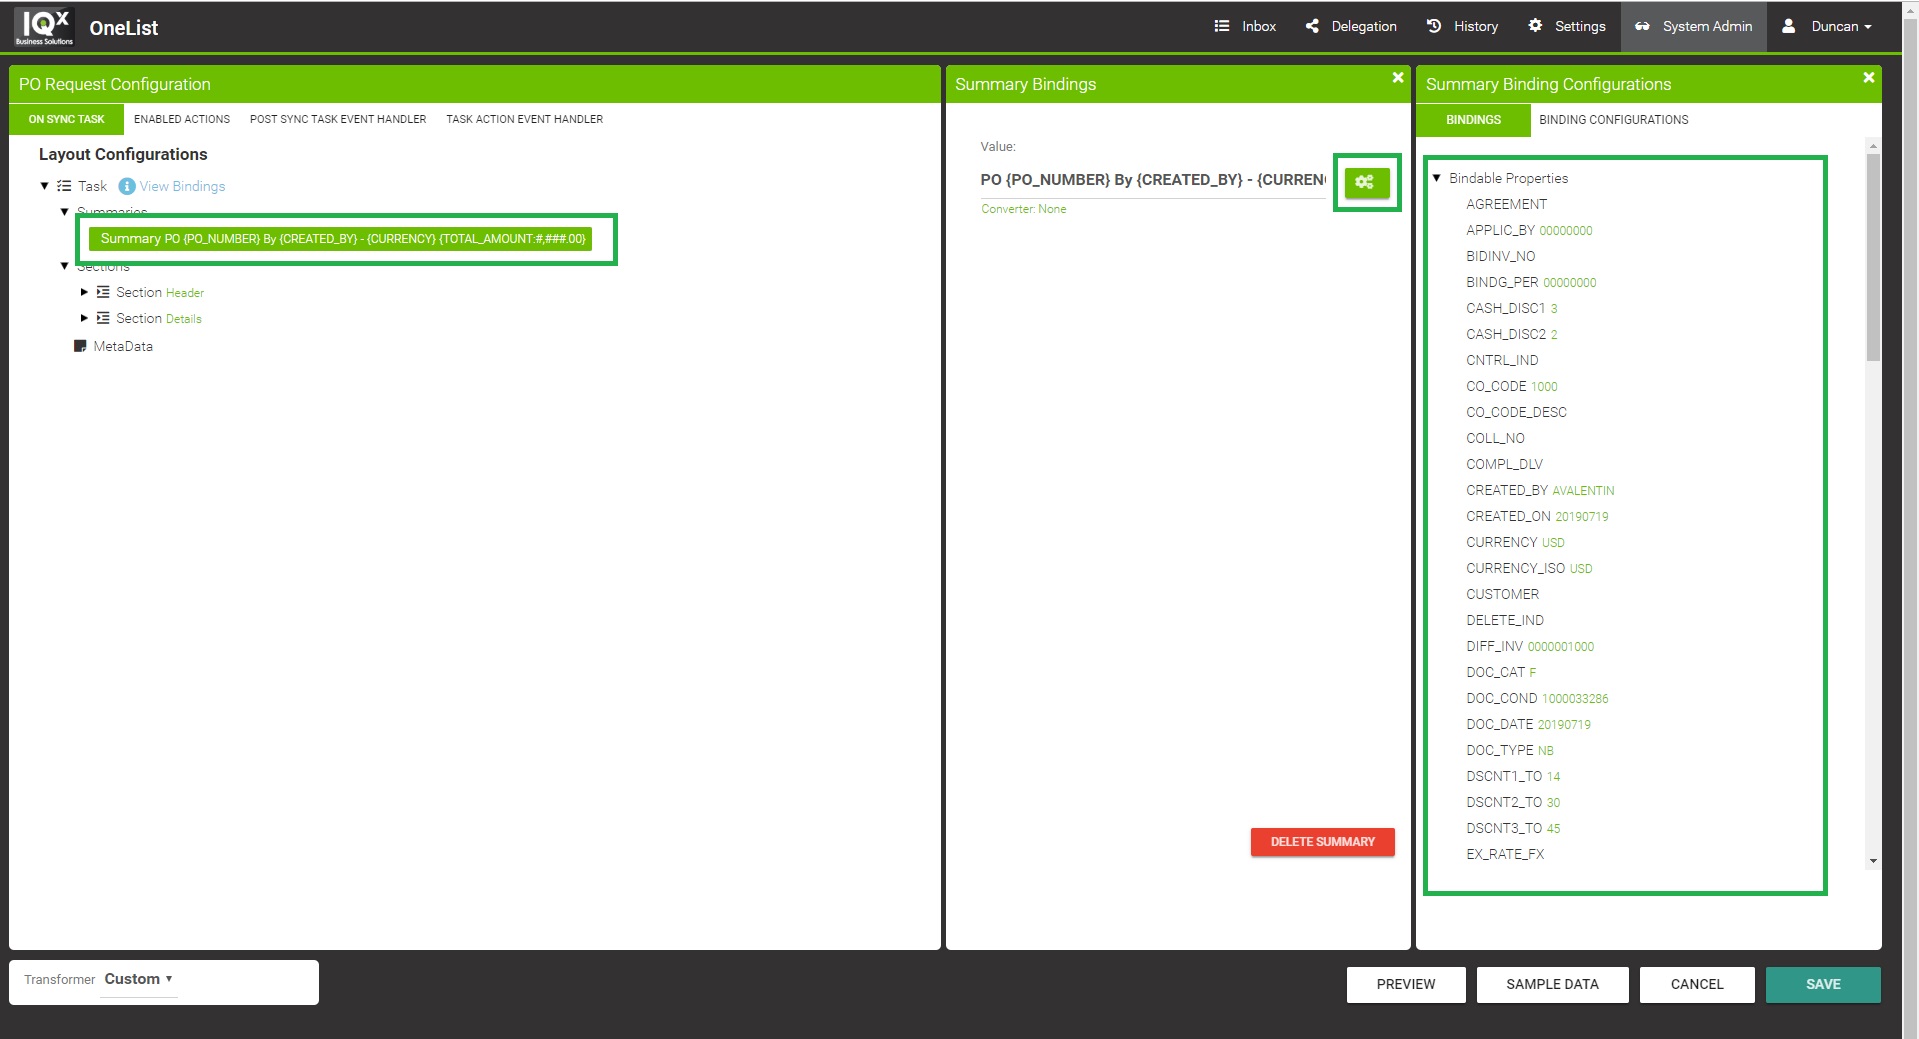
To bind a field in OneList to a property in SAP like Title or Value, click on the node (e.g. Summary) and then click on the cogs button beside the bindable field.
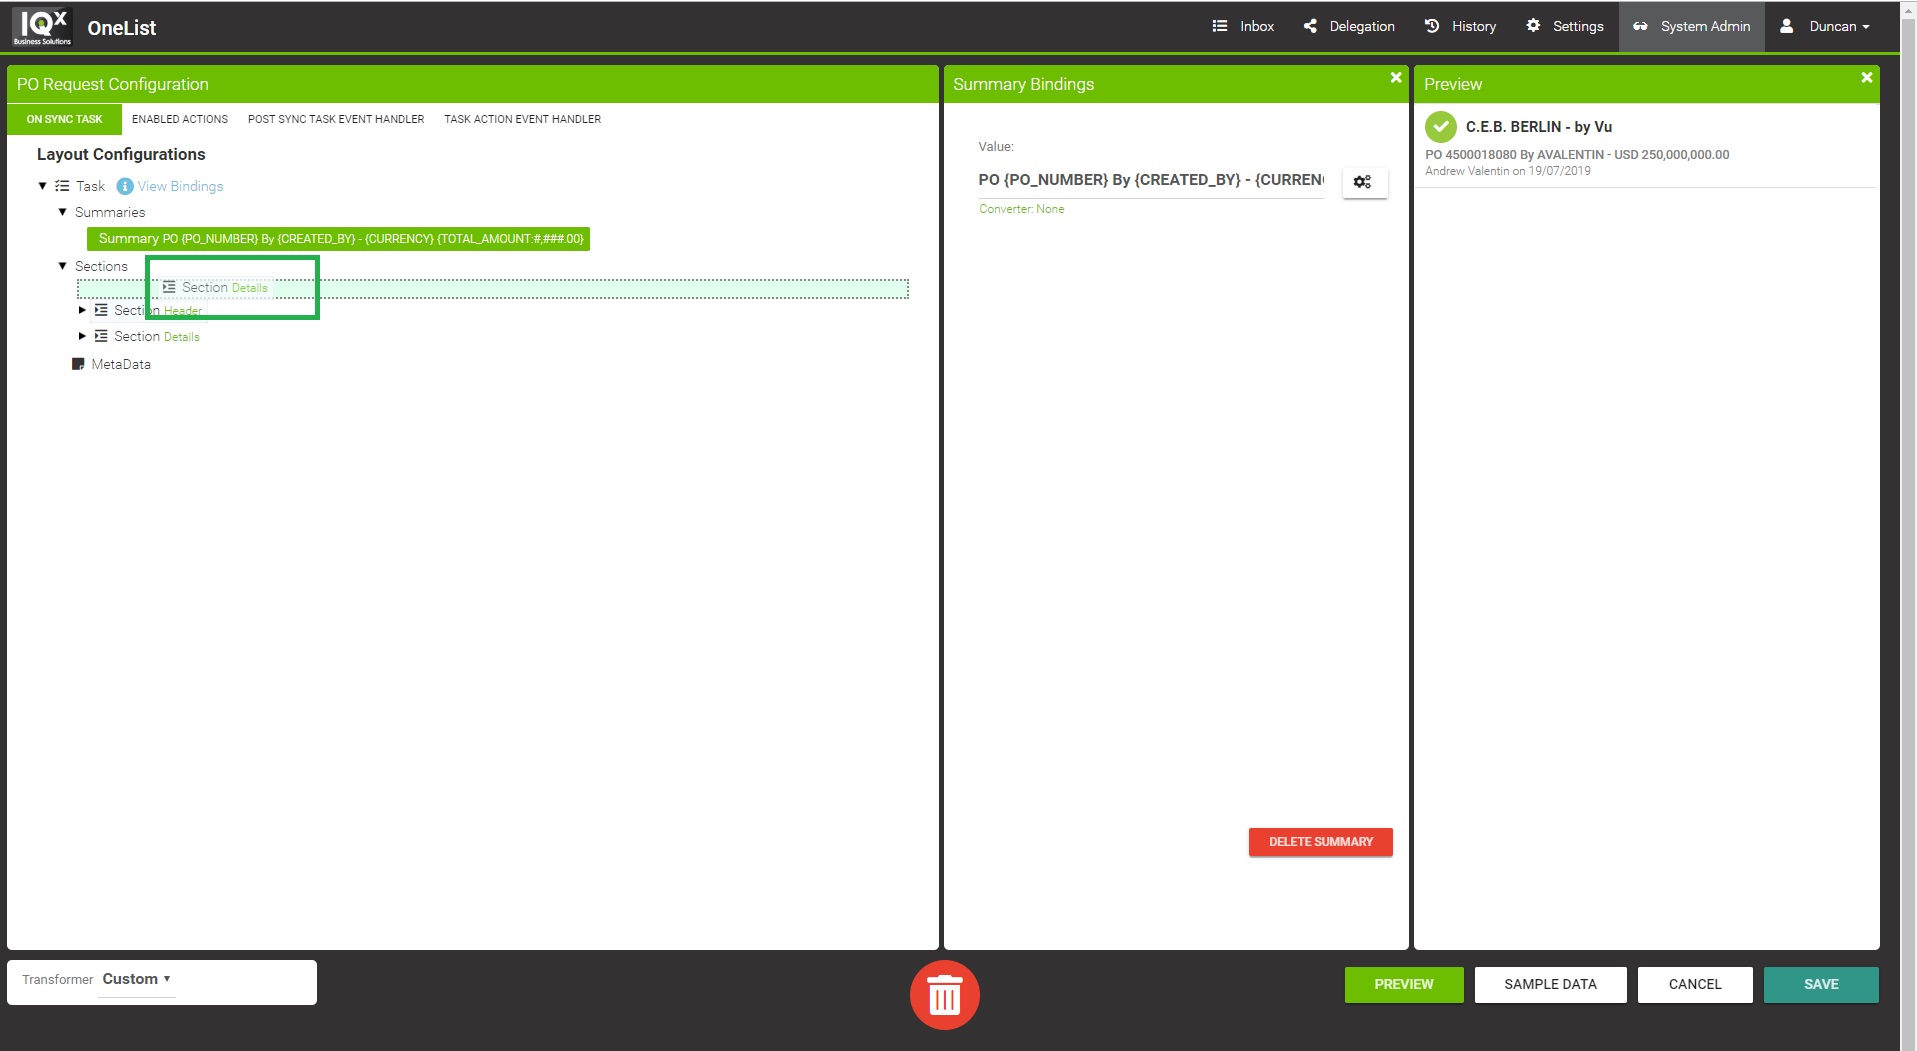
To reorder nodes (e.g. move a Section before another Section), drag & drop the node.
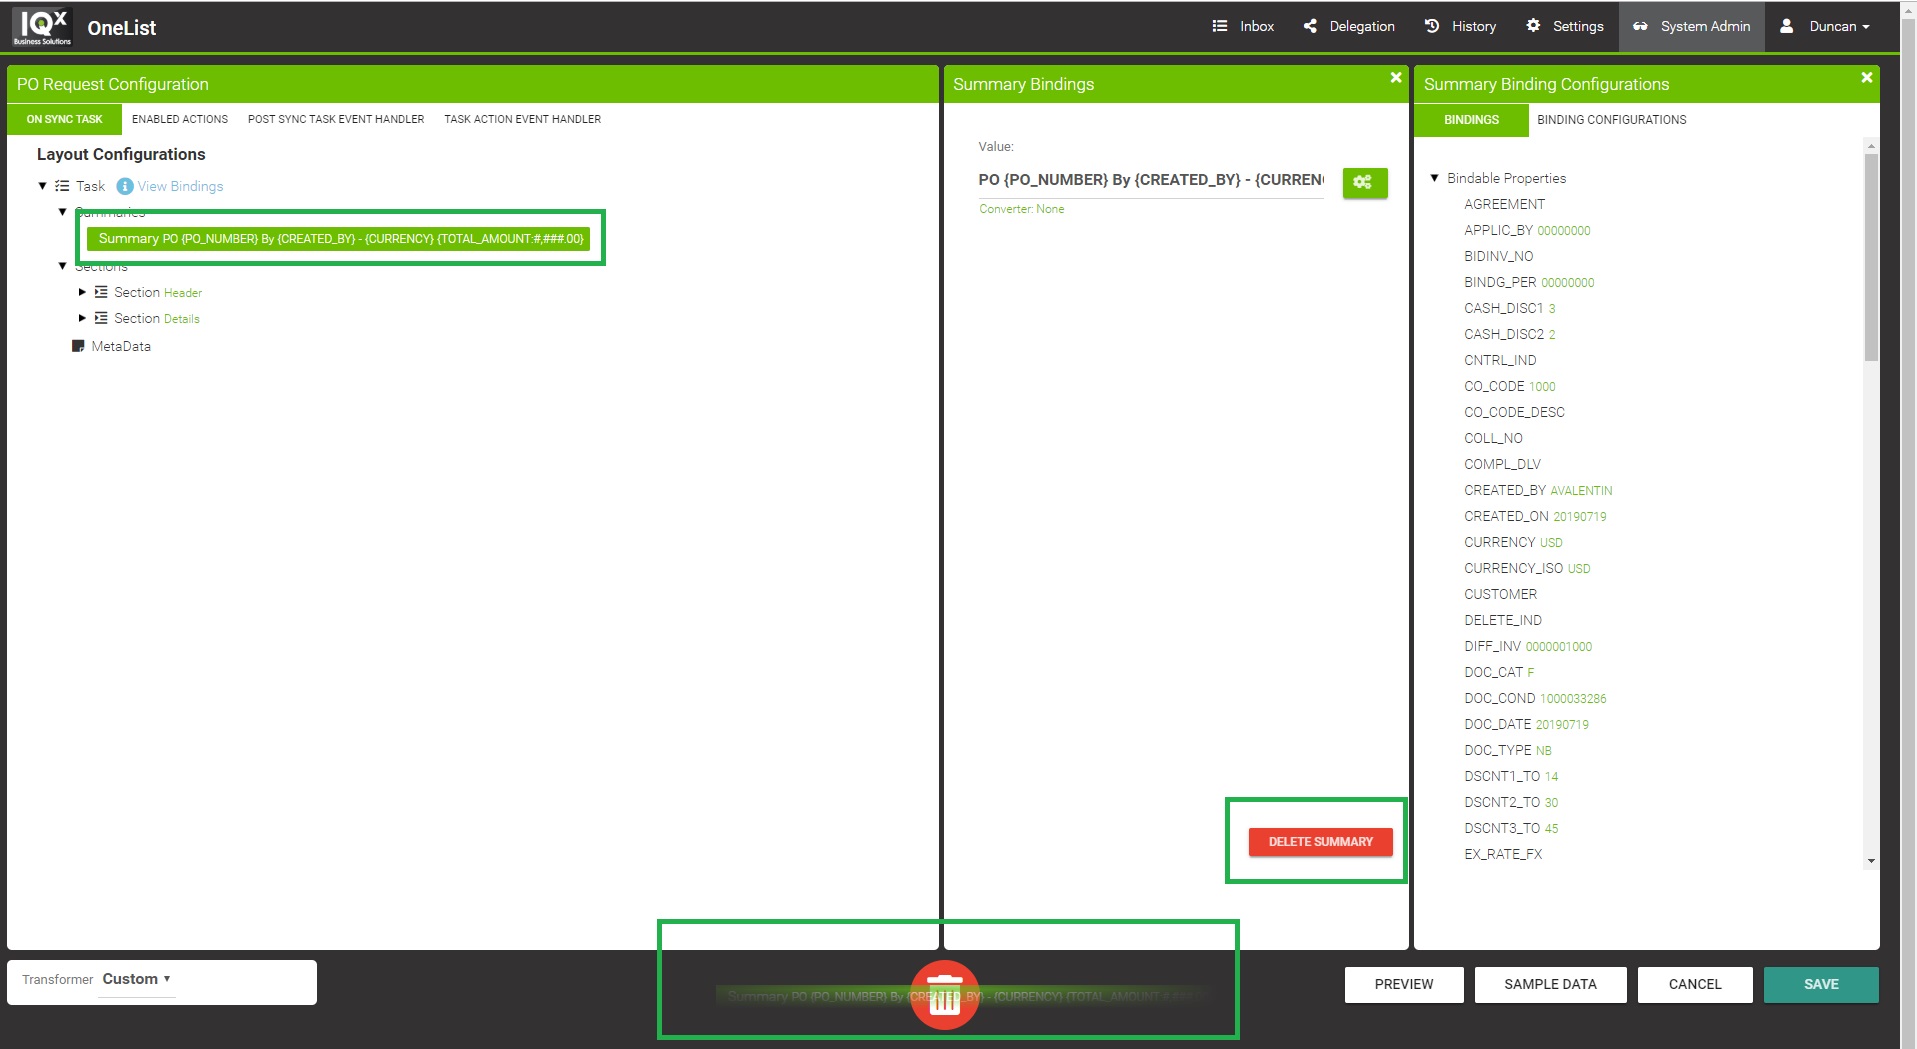
To delete a node, click the node you wish to delete and click on the red Delete button found in the 2nd pane.
Or drag the node to the red Bin icon found at the bottom bar which is visible once you start dragging a node.
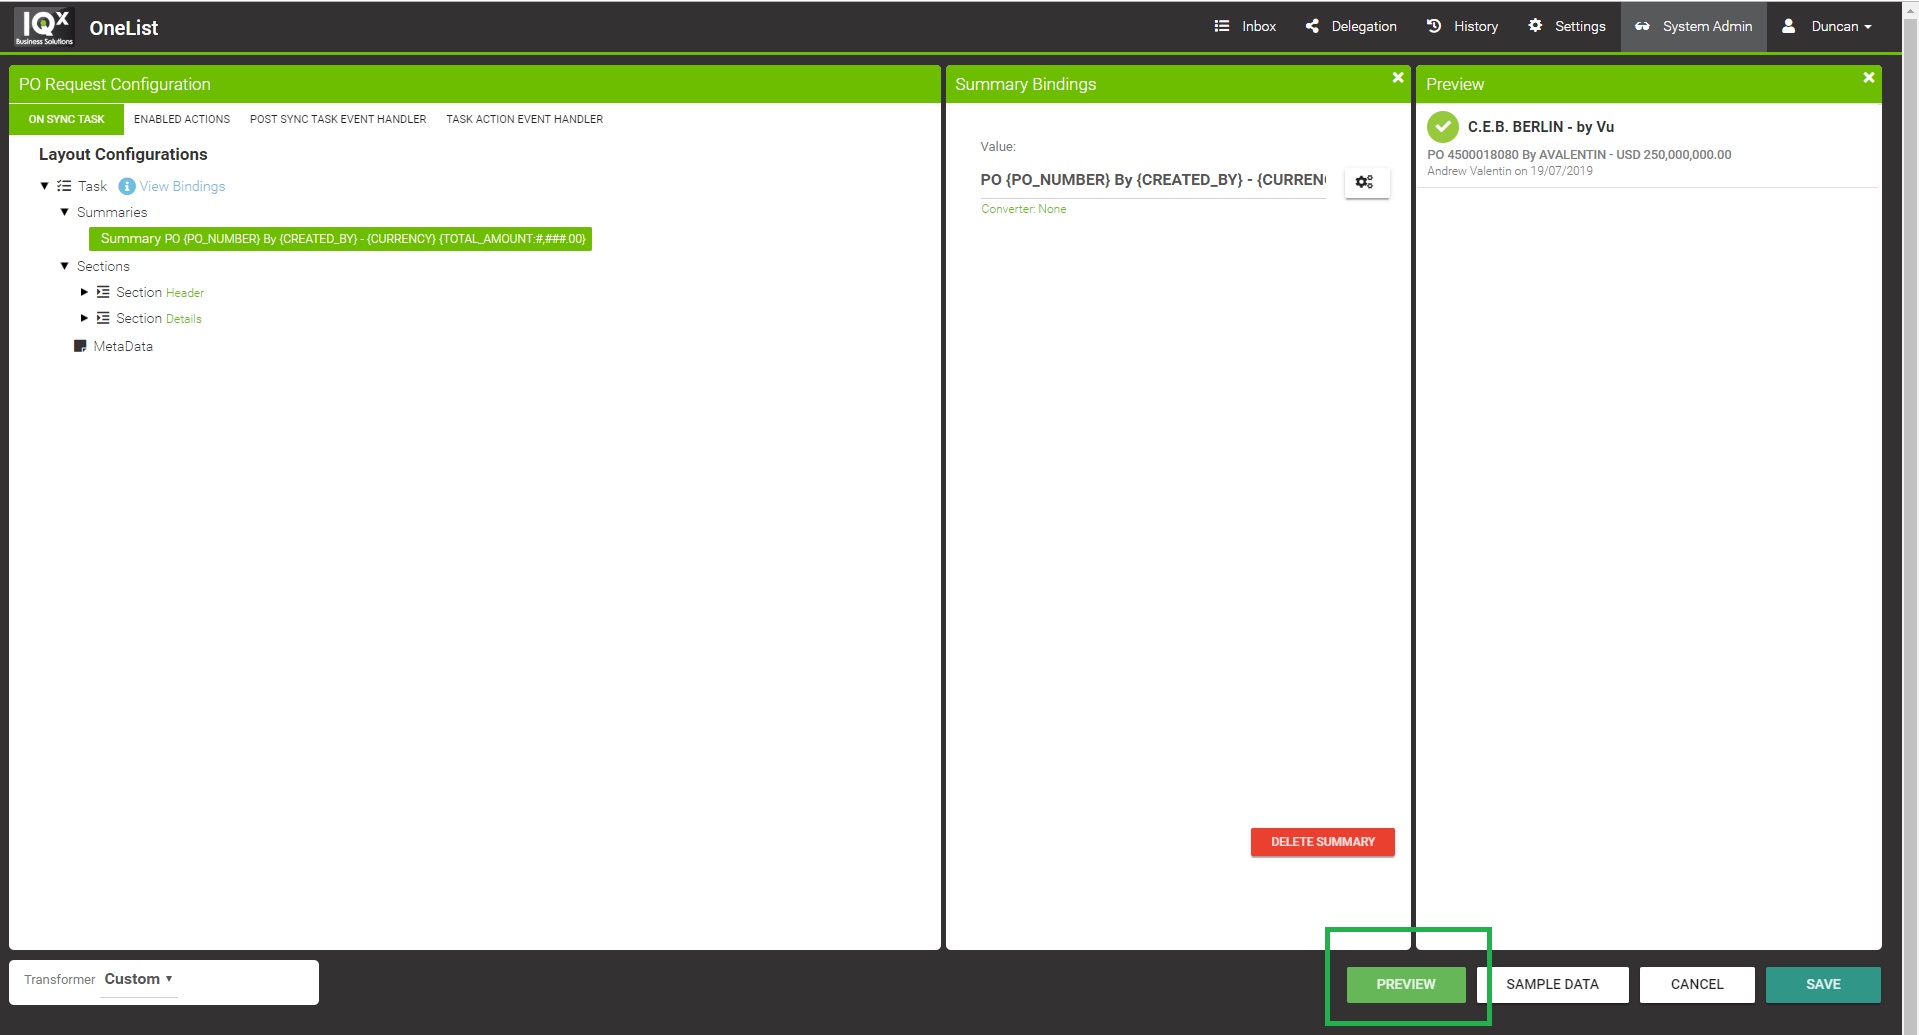
To preview your configuration, click on the "Preview" button found at the bottom bar.
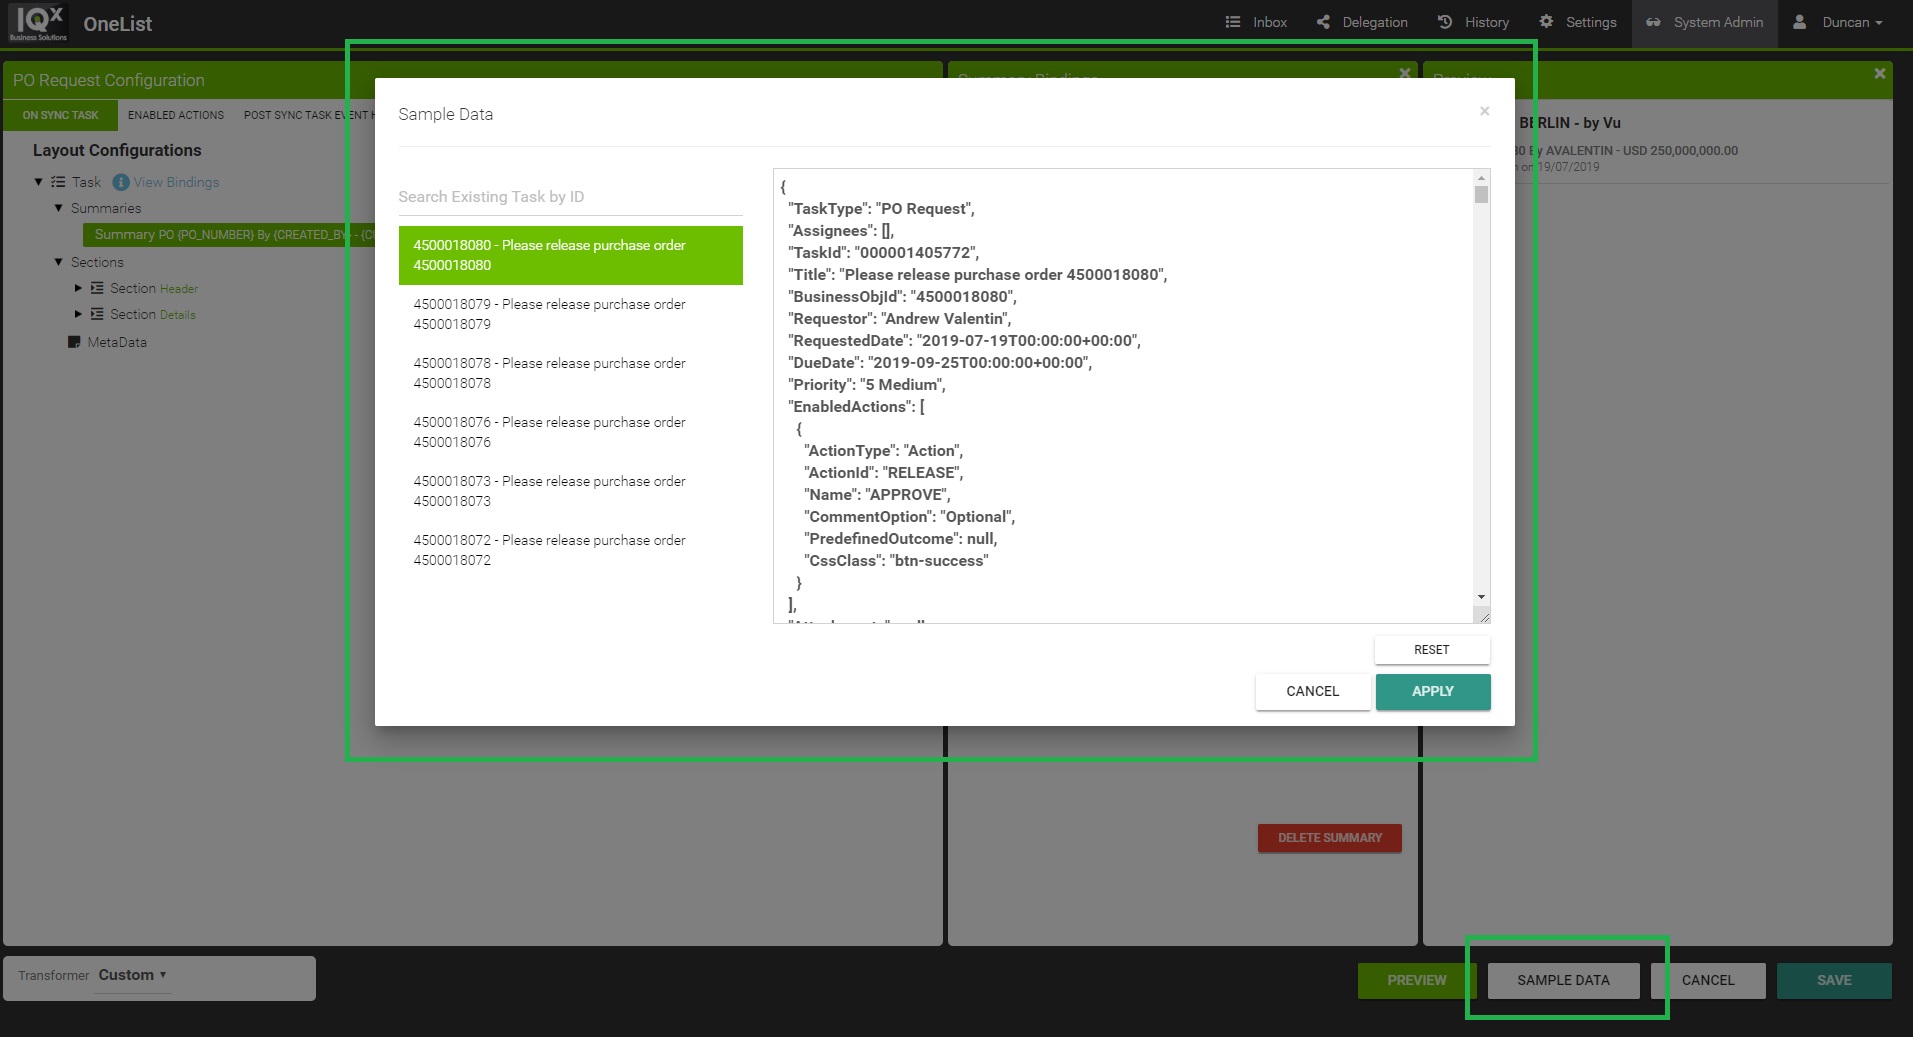
To maintain the Source System's Bindable Properties in the 3rd pane, click on the Sample Data button and select an existing task or upload a JSON of the WorkFlow Task from the Source System.
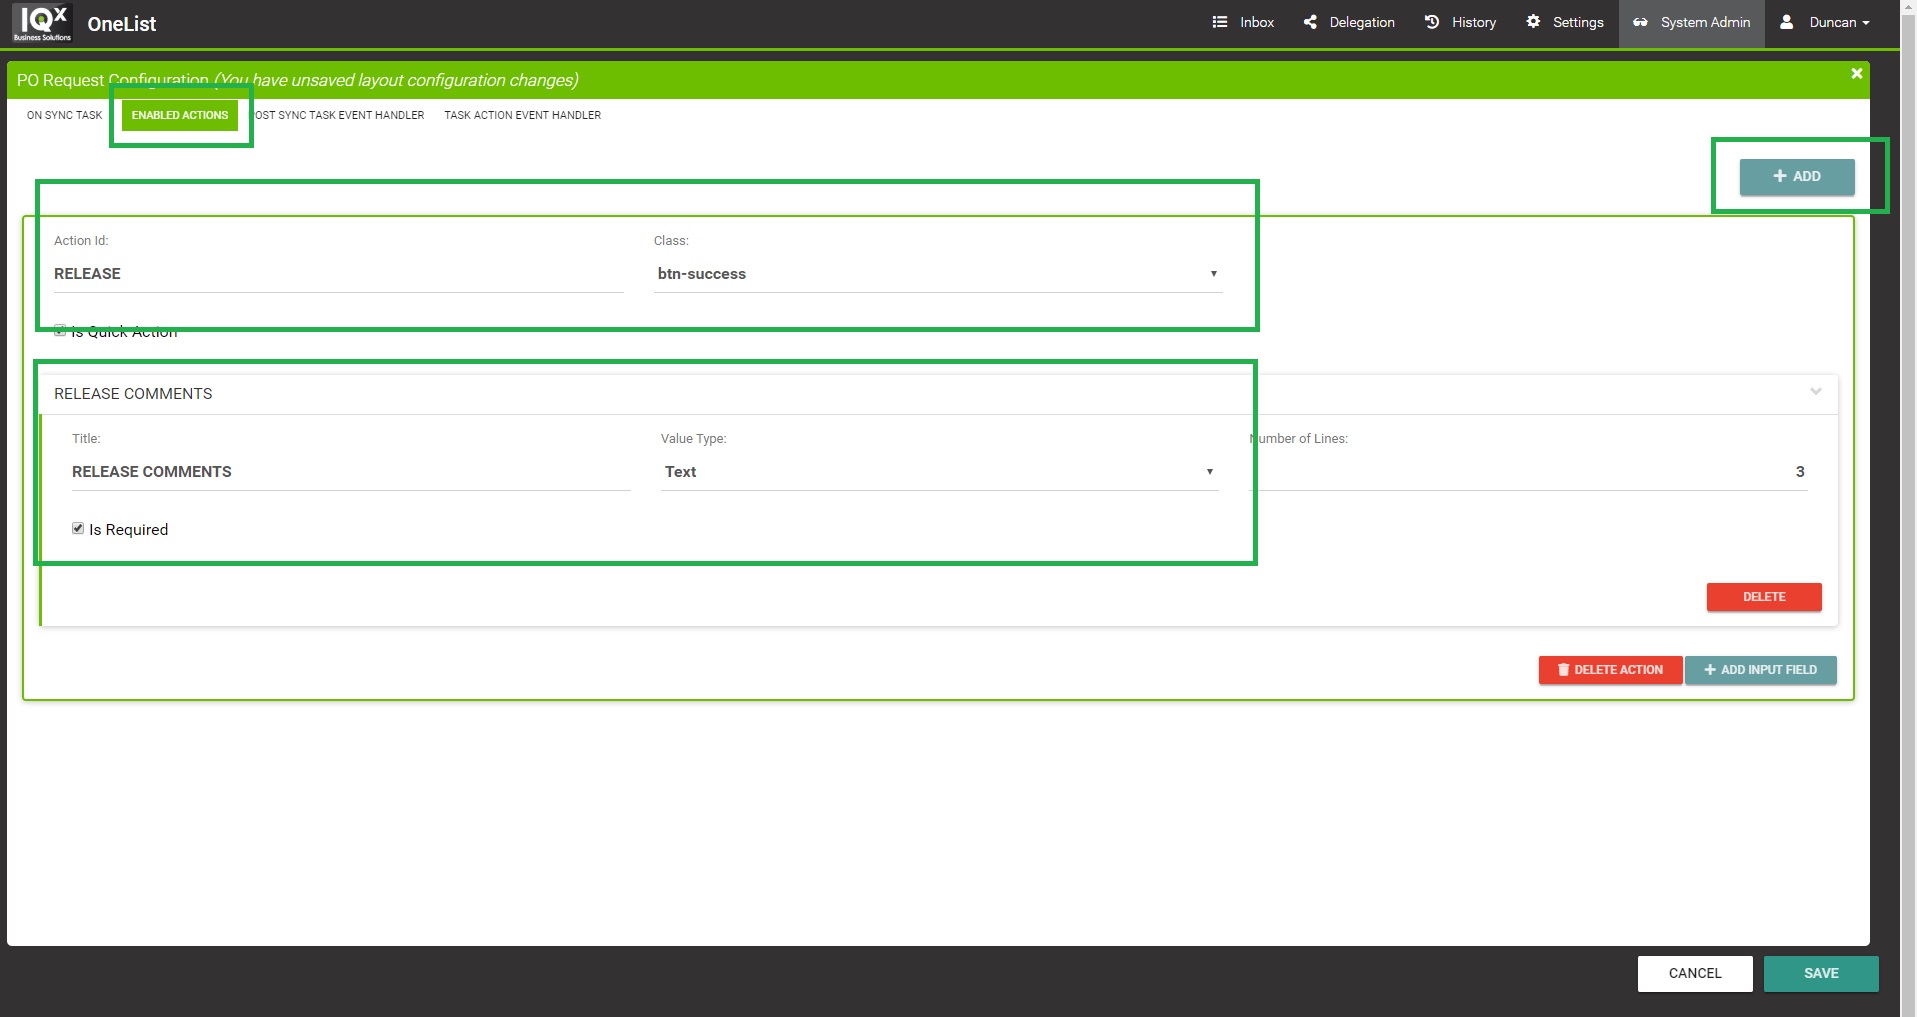
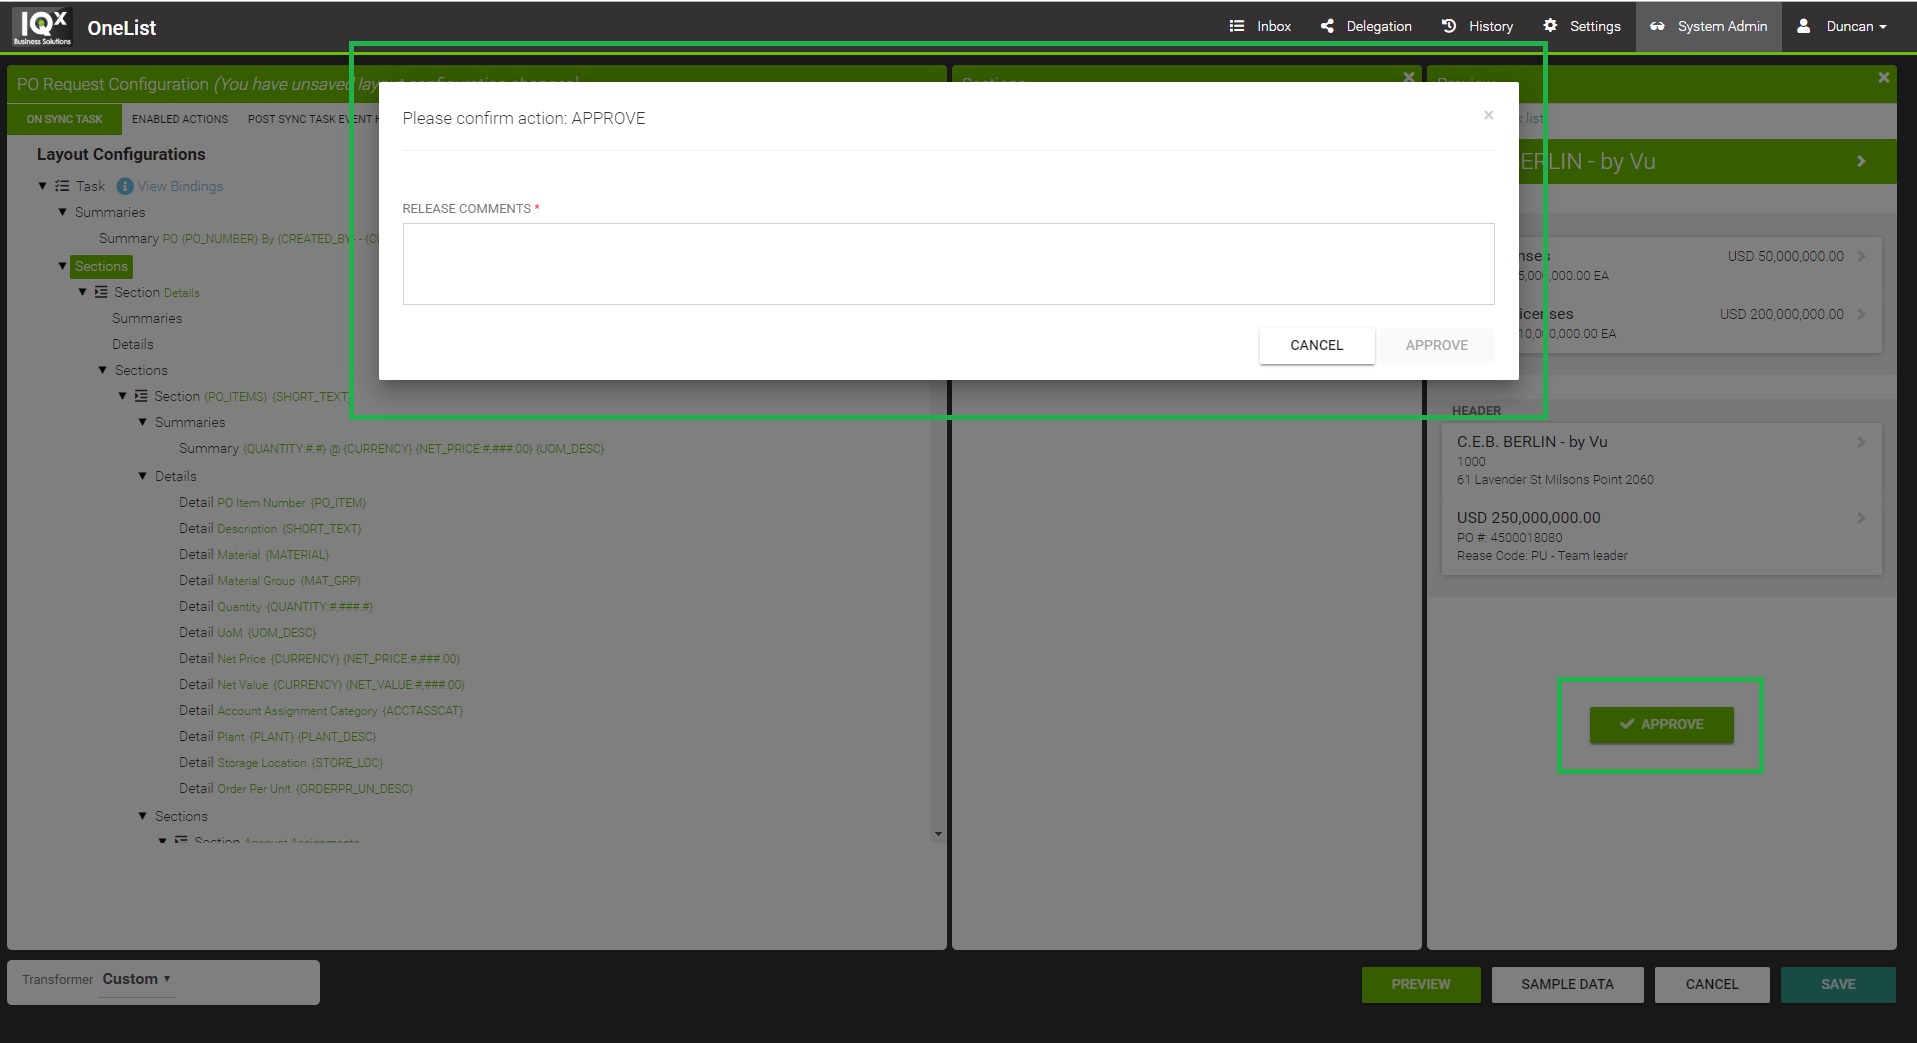
To change the color and add mandatory inputs to the action buttons in the preview, go to the Enable Actions tab.
In the Enabled Actions tab you can assign a class to an Action Id and add a mandatory input when the user clicks on the action.
E.g. Add a mandatory comment on Release.
To test the newly added class and input requirement for Release action, go back to the first tab and click Preview.
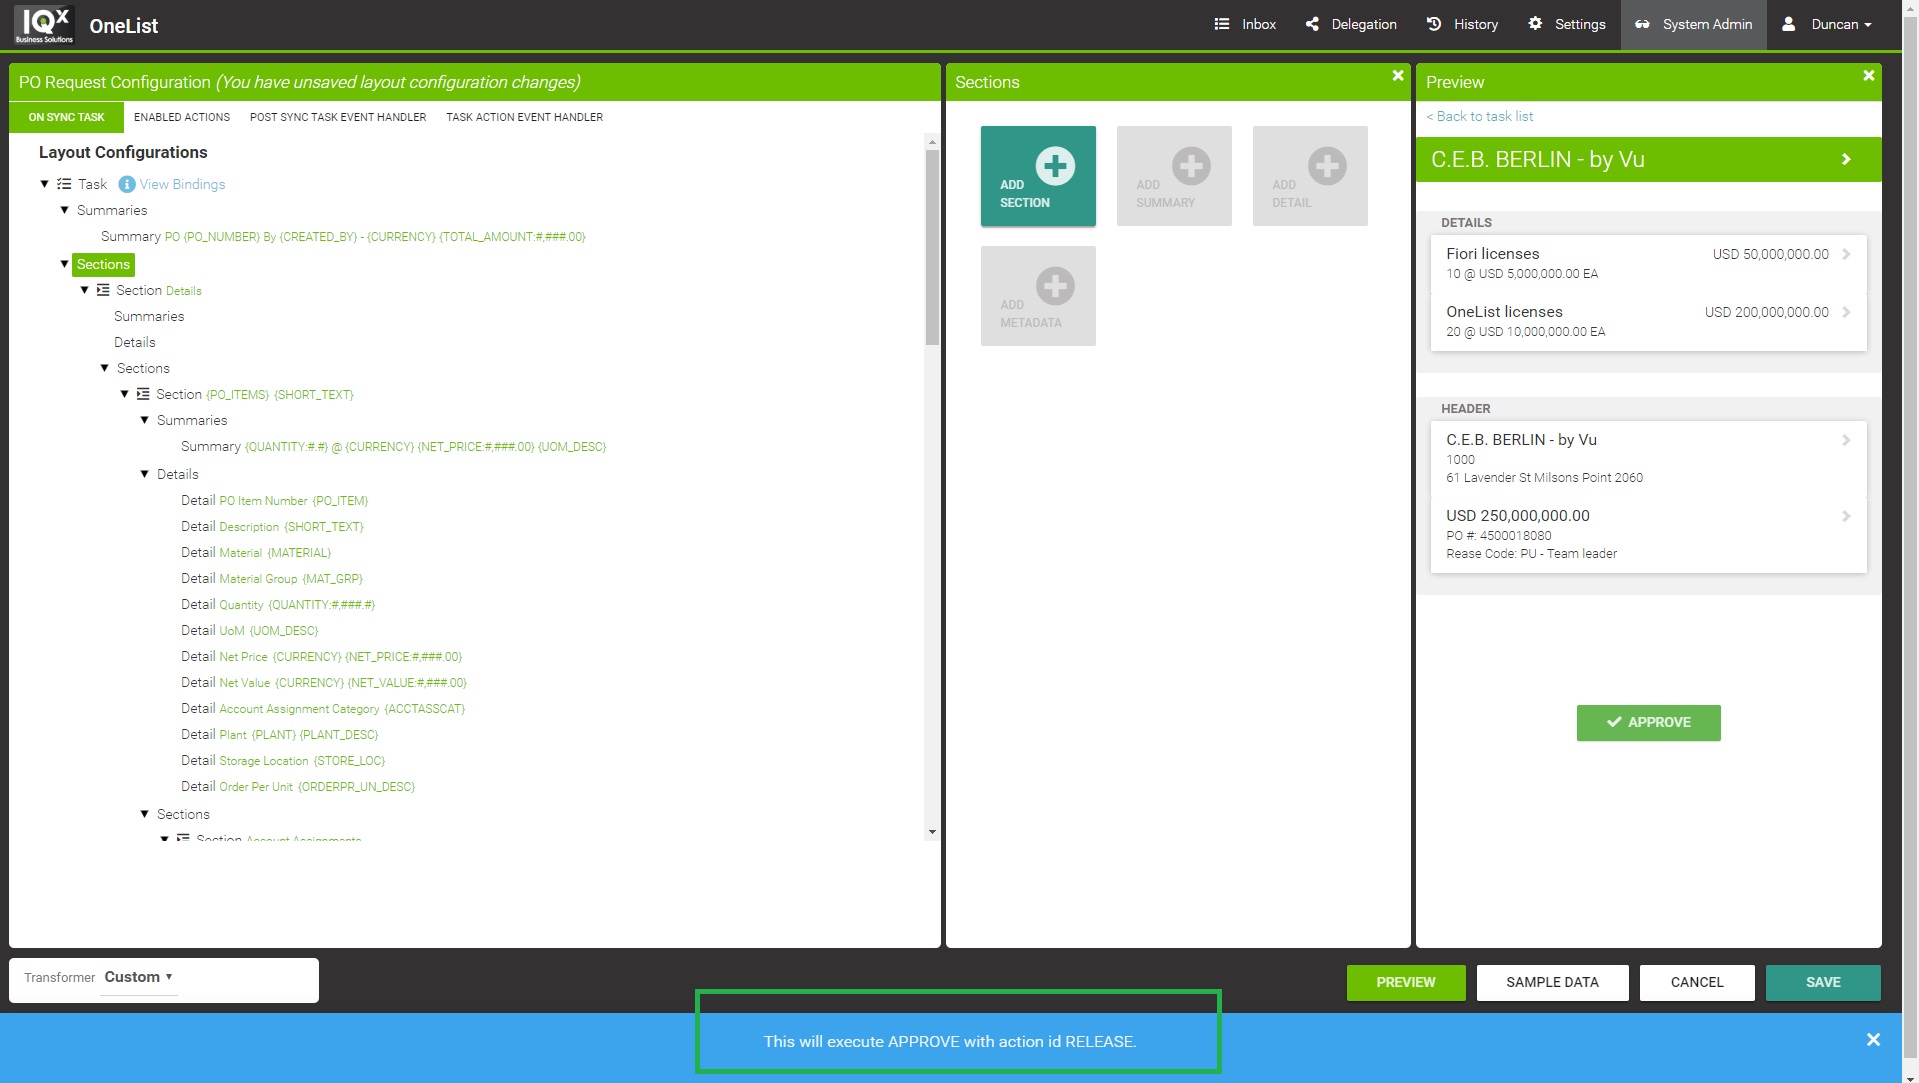
Test the action button in Preview to confirm it is showing the correct color that you wanted, and that it is prompting for a mandatory comment (if required).
The Preview will simulate the action by showing you a message with the action details at the bottom of the screen.
Related content
IQX OneList Documentation - 6.40