...
Post-deployment, the above three apps need to be configured in the IQX FAB Configuration: /IQX/FAB_CONFIG →Editors (See below)
Installing the FAB Application into your SCP Instance
- Log into the SAP Cloud Platform Cockpit
- Expand the Applications menu group on the side and select HTML5 Applications

- Select the Import from File option

- Upload the FAB SCP Install ZIP file and provide details for the Application Name (fab) and Version Name (Version number in major.minor.patch format. e.g. 2.3.0)

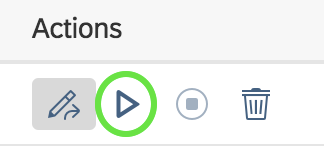
- Once the upload is complete, ensure the application shows "Started" in the status column. The application is not started, click the play button in the actions column.
Installing the FAB Framework into SCP Instance (correct steps)
- Log into the SAP Cloud Platform Cockpit
- Open WebIDE
- From the Menu select File → Import → File or Project
- Select the fab2.zip file to import (supplied by IQX)
- Select/Enter the Import folder (e.g. /fab)
- Once the import has completed, right-click on the new fab project in the Workspace tree
- Select Deploy → Deploy to SAP Cloud Platform
- Select Deploy a new application and click on Deploy
- After Deployment completed successfully, you have the option to Deploy the application to the SAP Fiori Launchpad (not required)
- Repeat steps 1 to 8 for the Icon Picker, Jason Editor, and Process Editor apps (only applicable to the Development environment)
Installing your Custom Applications into SCP
Option 1: Using Eclipse
- Convert the app to an offline application using the standalone and offline checkboxes in the property dialog within the FAB developer workbench. (FAB already exists as a BSP/standalone application)
- Use Eclipse to extract the application. (See here for details - Exporting an Application using Eclipse)
- Right-click the web-content folder and export to an archive.
- Open the archive and rename the web-content folder to webapp. (Zip again if necessary)
- Open up the WebIDE full-stack.
- Create a new project.
- Right-click on the newly created project and use the Import from file option.
- Use the ZIP file you created.
| Info | ||
|---|---|---|
| ||
This is the recommended approach when working on a SAP version lower than 740. The reason being is that the ADT service/node will not be available in those systems and using SAP WebIDE to access the SAPUI5 repository will not work. |
Option 2: Using SAP WebIDE
- Convert the app to an offline application using the standalone and offline checkboxes in the property dialog within the FAB developer workbench. (FAB already exists as a BSP/standalone application)
- Ensure you have a Destination created for the HTTP connection to the required SAP backend
- Open SAP WebIDE
- Go to the Home page
- At the bottom, there should be an Import from SAP UI5 Repository option
- Select the destination for the SAP system
- Search for the application and select it.
- After the import, right-click on the Web-Content folder and rename to webapp
| Info | ||
|---|---|---|
| ||
| The neo-app.json file must be in the root of the folder. When importing FAB2, there are instances where the file will be saved incorrectly inside the web-content/webapp subfolder. It MUST be moved to the root! |
You may also need to manually copy the following folders and files into the project once created.
- /controls
- /core
- /scripts
- /searchHelps
- /Formatter.js
- /userFunctions.js
FAB Configuration for Icon Picker, Jason Editor and Process Editor Apps.
Navigate to the /IQX/FAB_CONFIG transaction. Open the Editors tab:
...
http:// <SAPNWGWServer:port>/sap/bc/bsp/iqx/fab_script2/default.htm

Page across to the Left >
...