...
- Select the Form Element where you want to add an Input field and right click.

- Select Add Input. Click on Input to access it's properties.

The mandatory property that must be entered for the Input is the “Bound Field”.
This is the field where the Input data is stored when the Form is submitted.
Simply name the field as required. In this example, the Bound Field name is ‘Expenditure Amount”.
Type in “ExpenditureAmount” in the Bound Field property and press enter.
Notice that a the field “ExpenditureAmount” automatically appears on the right hand “Fields” section.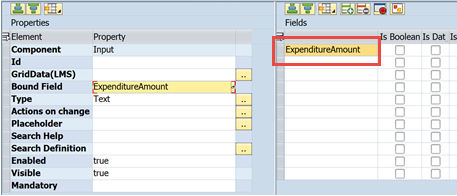
The Fields section eventually contains all the fields for the Form. It is essentially the ‘data dictionary’ of the Form.
In certain cases, it may be necessary to flag a field as being of a particular type (Boolean, Date, Integer or Float), depending on the use of the field (for example fields bound to CheckBoxes should be Boolean). But by default most fields can be just String (ie no specific type).
Press Save and see the result.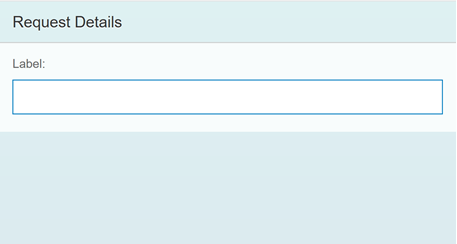
Now change the “Label” of the Input field to say “Expenditure Amount”.
To do this, select the Form Element above the Input in the tree and change the Label property.
Press Save.

Form Element (values supplied by system)
Some form elements can be defined and have the system pre-fill the relevant data.
You can define a form element and bind the form element data to FAB supplied data.
For example, the 'Requested by' name can be determined and pre-filled by binding the field to 'SubmittedByEname'.
...
Several other defaults are available and can be seen by using the search option on the Bound Field.
System Field Source
SubmittedByEname user_addr
SubmittedByOrgUnit
SubmittedByOrgeh
SubmittedByPernr
SubmittedByPlans
SubmittedByPosition
SubmittedDate
SubmissionStage
AdministratorFl
ApprovalRequiredFl
CurrentApprovalLevel
CurrentLevelAction
CurrentLevelApprovedFl
CurrentStatus
NextApproverVisible
NextApproversList
Other Element Types
Below are some of the other Element Types that you can add.
...
Follow the steps below to change the Title of a Page.
Step-by-step guide
Click on the Page component.
Change the Title to the title of your form.
- Click on Save.

| Info |
|---|
Related articles
| Filter by label | ||||||||||||||||||
|---|---|---|---|---|---|---|---|---|---|---|---|---|---|---|---|---|---|---|
|
...